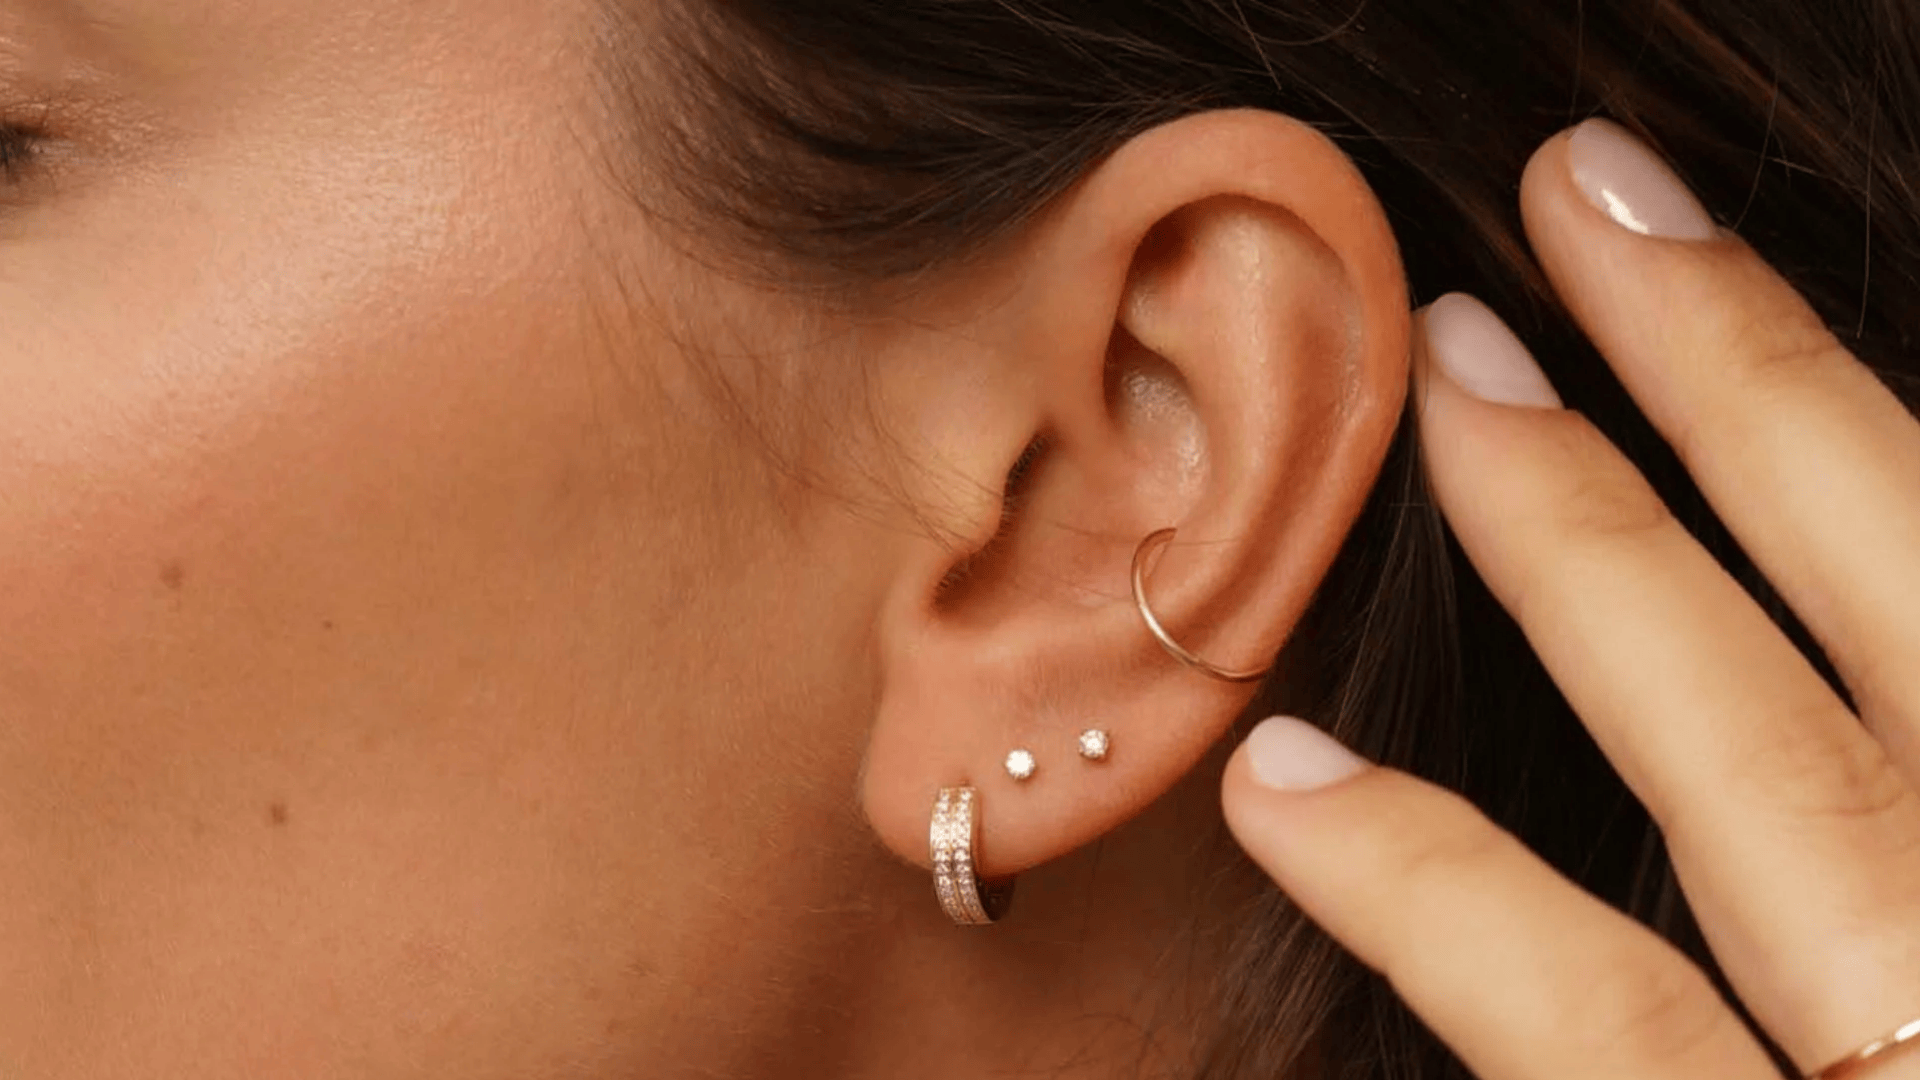
Thinking about getting a new ear piercing? You’re not alone! More people than ever are creating their own unique “curated ear” look, mixing different piercings to express their personal style.
But with so many options out there, it’s easy to feel confused. Which piercing should you choose? How much will it hurt? And what are all those different ear piercings actually called?
Don’t worry. I’ve got you covered.
These are the different types of ear piercings, from simple lobe piercings to more fun cartilage options.
You’ll learn the proper ear piercing names, get honest info about pain levels, and realistic healing times. Plus, I’ll share safety tips to help you have the best piercing experience possible.
Quick Ear Anatomy
Before I dive into all the cool piercing options, let’s take a quick look at the parts of your ear. Think of your ear like a map. Once you know the basic landmarks, everything else falls into place.
Your ear has two main areas:
The lobe is that soft, squishy bottom part that most people get pierced first. It’s made of fatty tissue (no cartilage here!), which is why lobe piercings usually hurt less and heal faster.
Cartilage makes up the rest of your ear: that firmer material you can feel along the rim and inside curves.
Cartilage is tougher than your lobe, but it also takes longer to heal. The outer rim is called the helix, while the inner folds have special names like the tragus (that little bump near your face), the conch (the bowl-shaped area), and the antihelix (the inner ridge).
Pro tip: Cartilage piercings need more patience because they have less blood flow than your lobe. Expect months of healing, not weeks, but with proper care, they’re totally worth it!
Different Ear Piercings: All Types
Now for the fun part. Let’s look at all the different ear piercings’ names and what they mean!
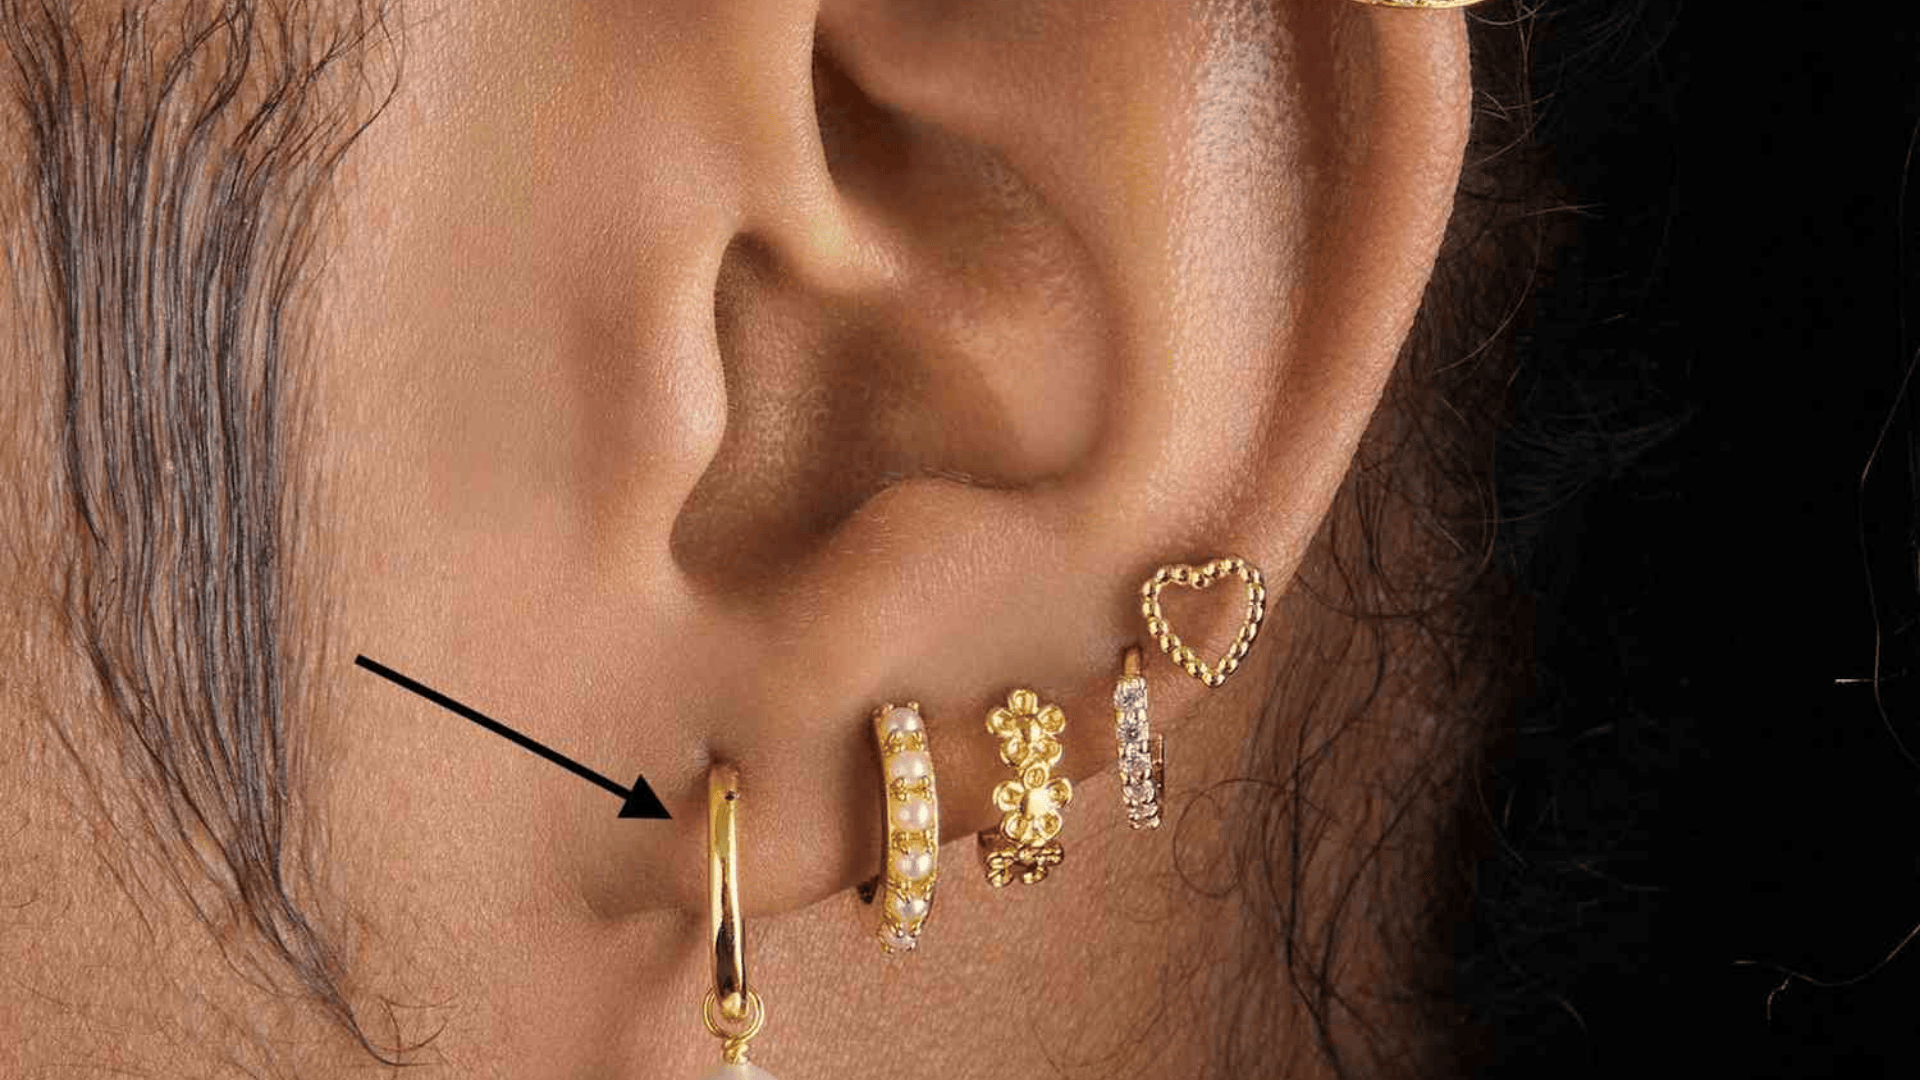
1. Standard Lobe
| Pain (1–10) | Typical healing | Best starter jewelry |
|---|---|---|
| 1–2 | 6–8 weeks | Flat-back labret or small stud in implant-grade titanium / 14–18k gold |
This is the most common piercing, right in the center of your earlobe. It’s the perfect first piercing because it’s quick, relatively painless. Almost everyone starts here!
2. Upper / Second (High) Lobe
| Pain | Healing | Best starter jewelry |
|---|---|---|
| 2 | 6–12 weeks | Flat-back stud; downsize after initial swelling |
Want more than one lobe piercing? The upper lobe sits higher on your earlobe, still in that soft tissue. Same easy healing, same gentle pain level.
3. Stretched Lobe (Gauged)
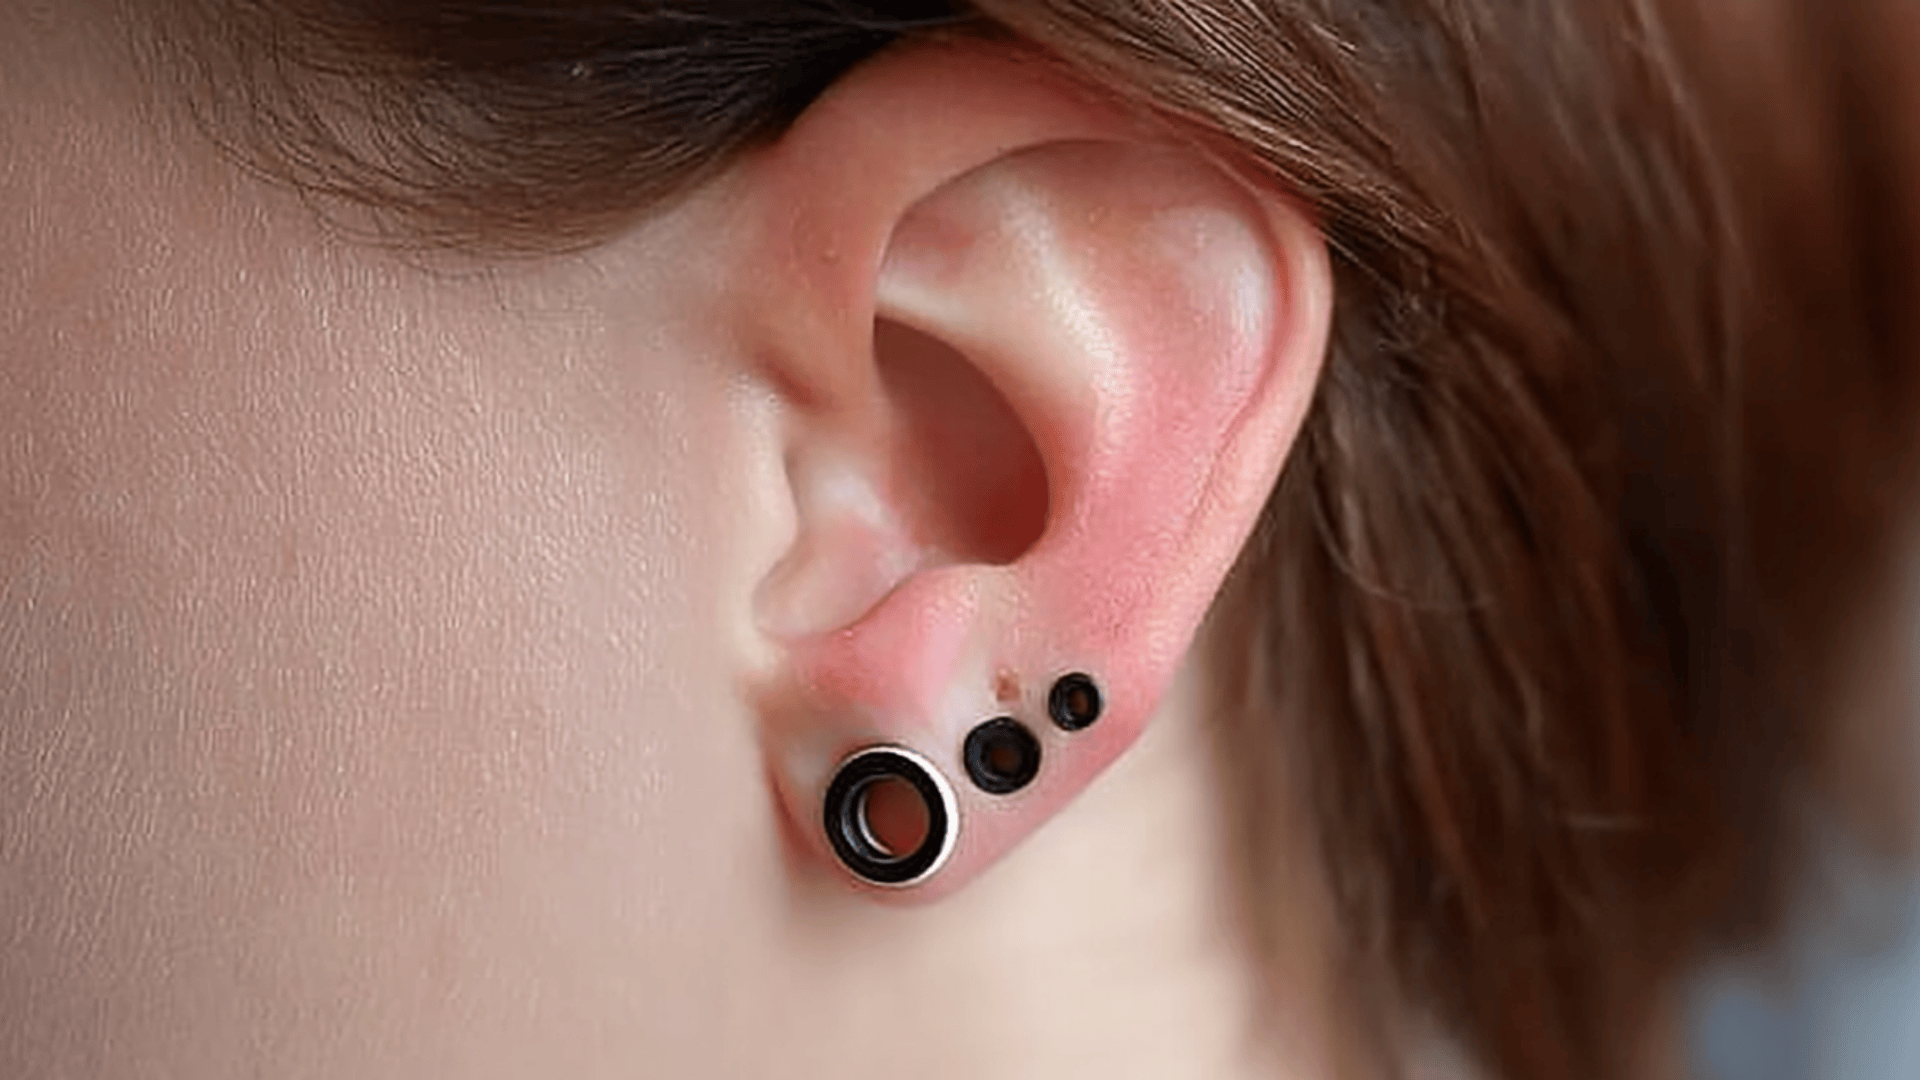
| Pain | Healing | Best starter jewelry |
|---|---|---|
| 2 (initial) | 4–8+ weeks between size increases | Single-flare titanium plug/tunnel; stretch slowly |
This is when you gradually make your lobe piercing bigger over time using special jewelry. It’s a commitment and requires patience. When done right, though, it creates a bold, distinctive look.
4. Transverse Lobe
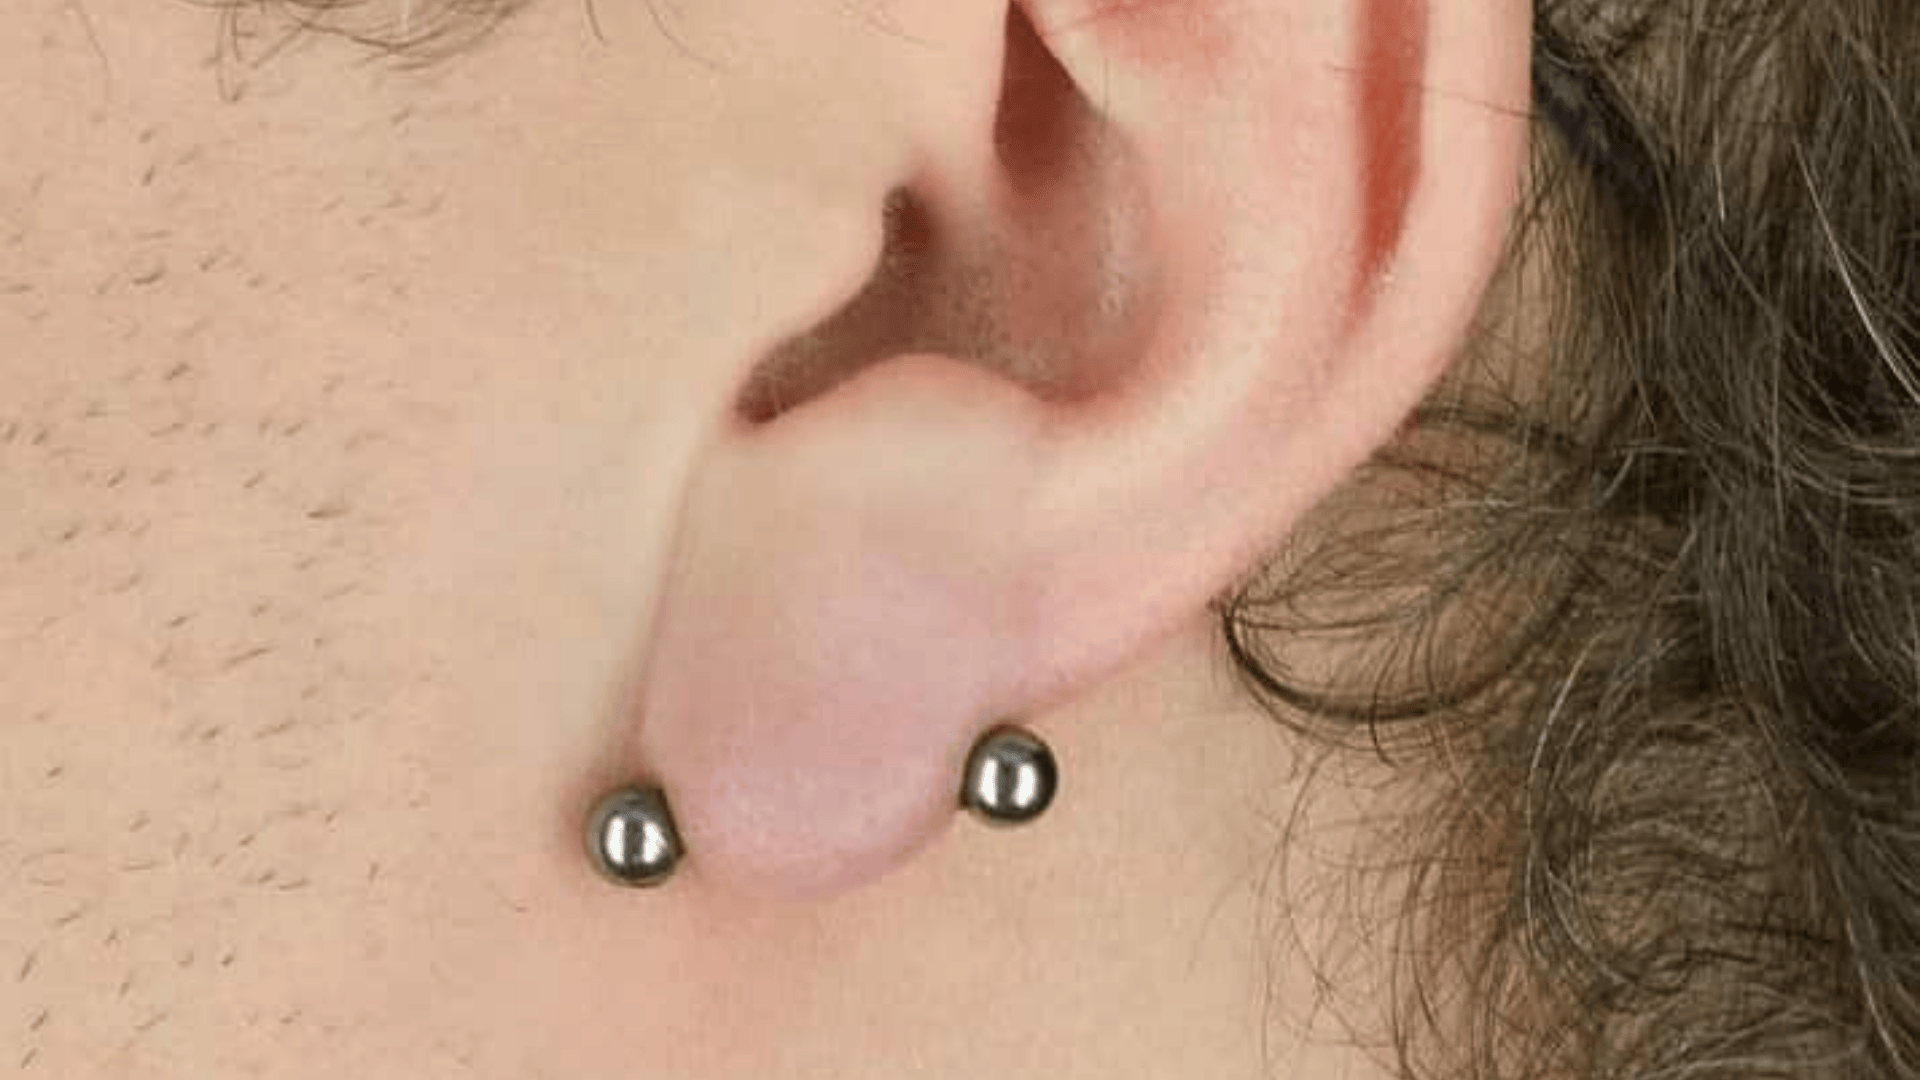
| Pain | Healing | Best starter jewelry |
|---|---|---|
| 4–6 | 2–10 months | Straight/curved barbell sized to lobe thickness |
Instead of going front to back through your lobe, this piercing goes horizontally through your lobe. A long barbell sits inside the lobe with ends showing on the top and bottom edges. It’s unique but takes extra care.
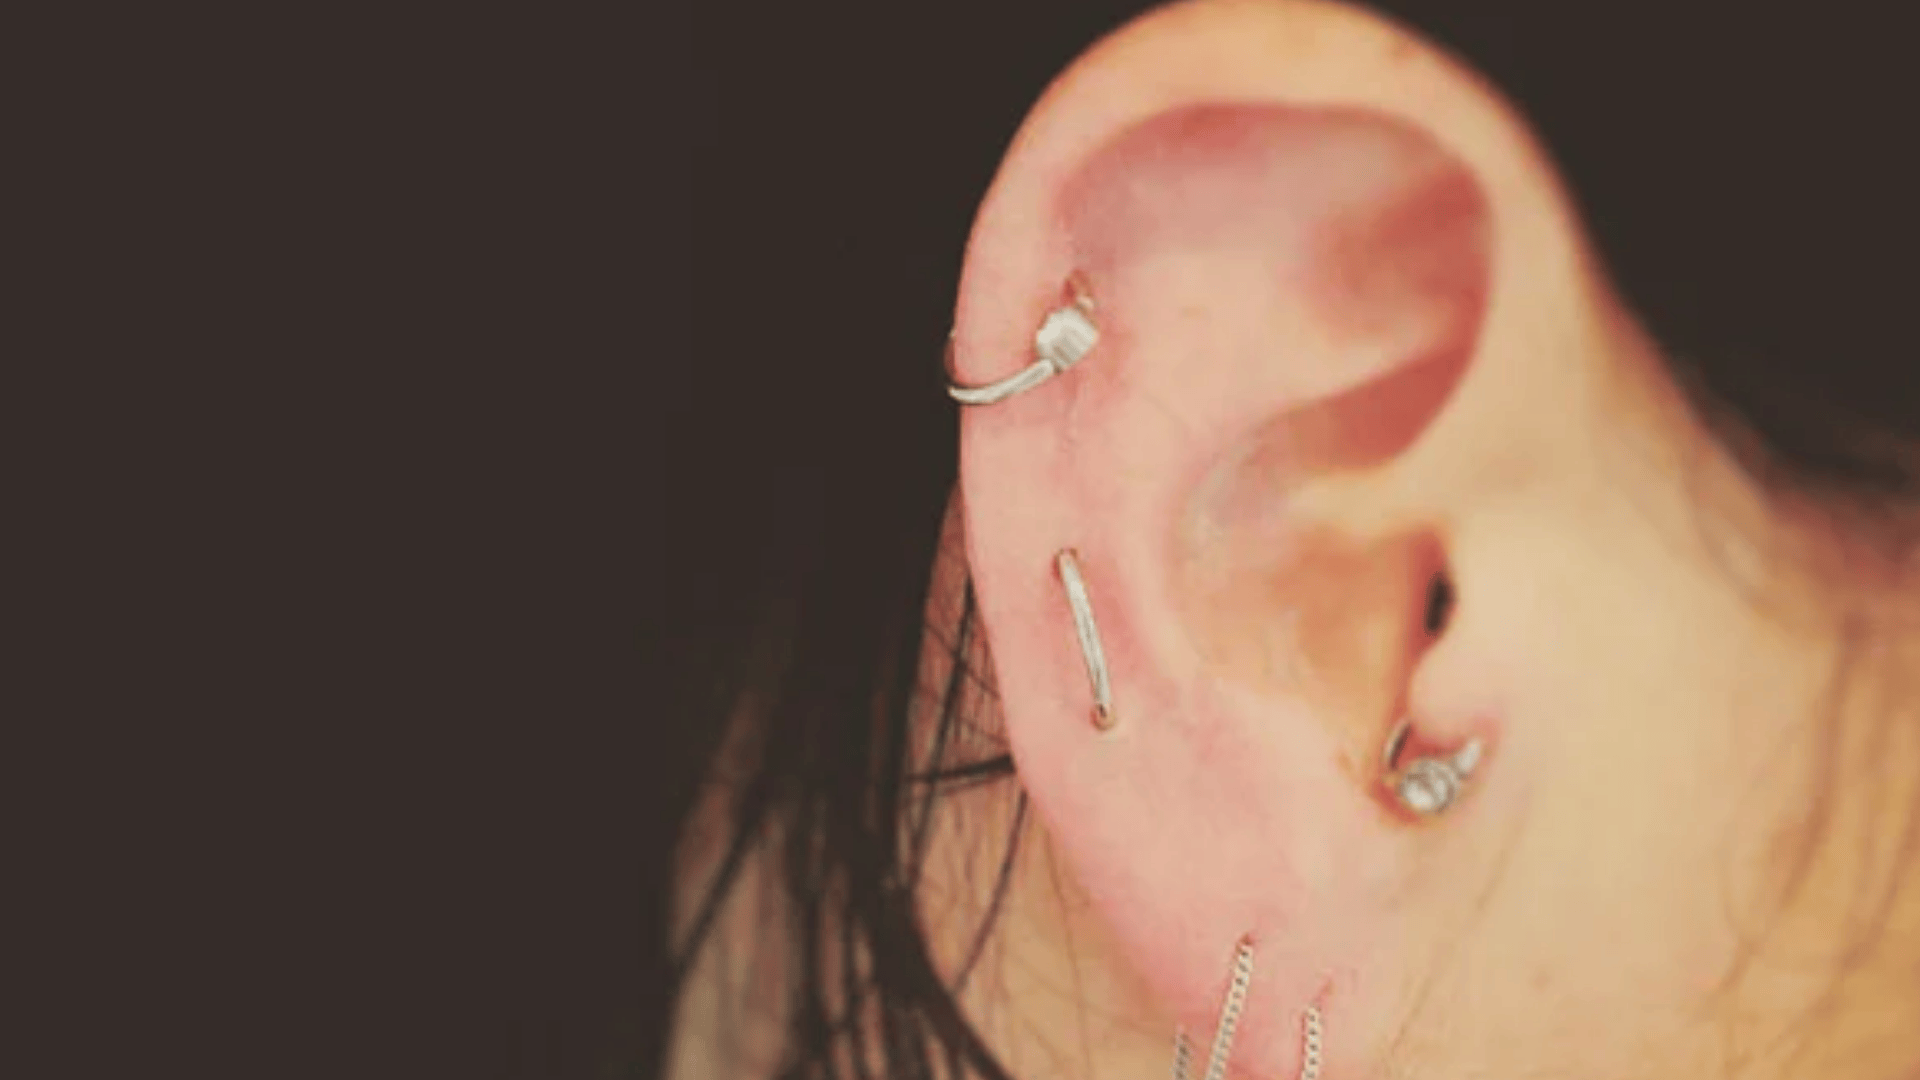
5. Helix (Outer Rim)
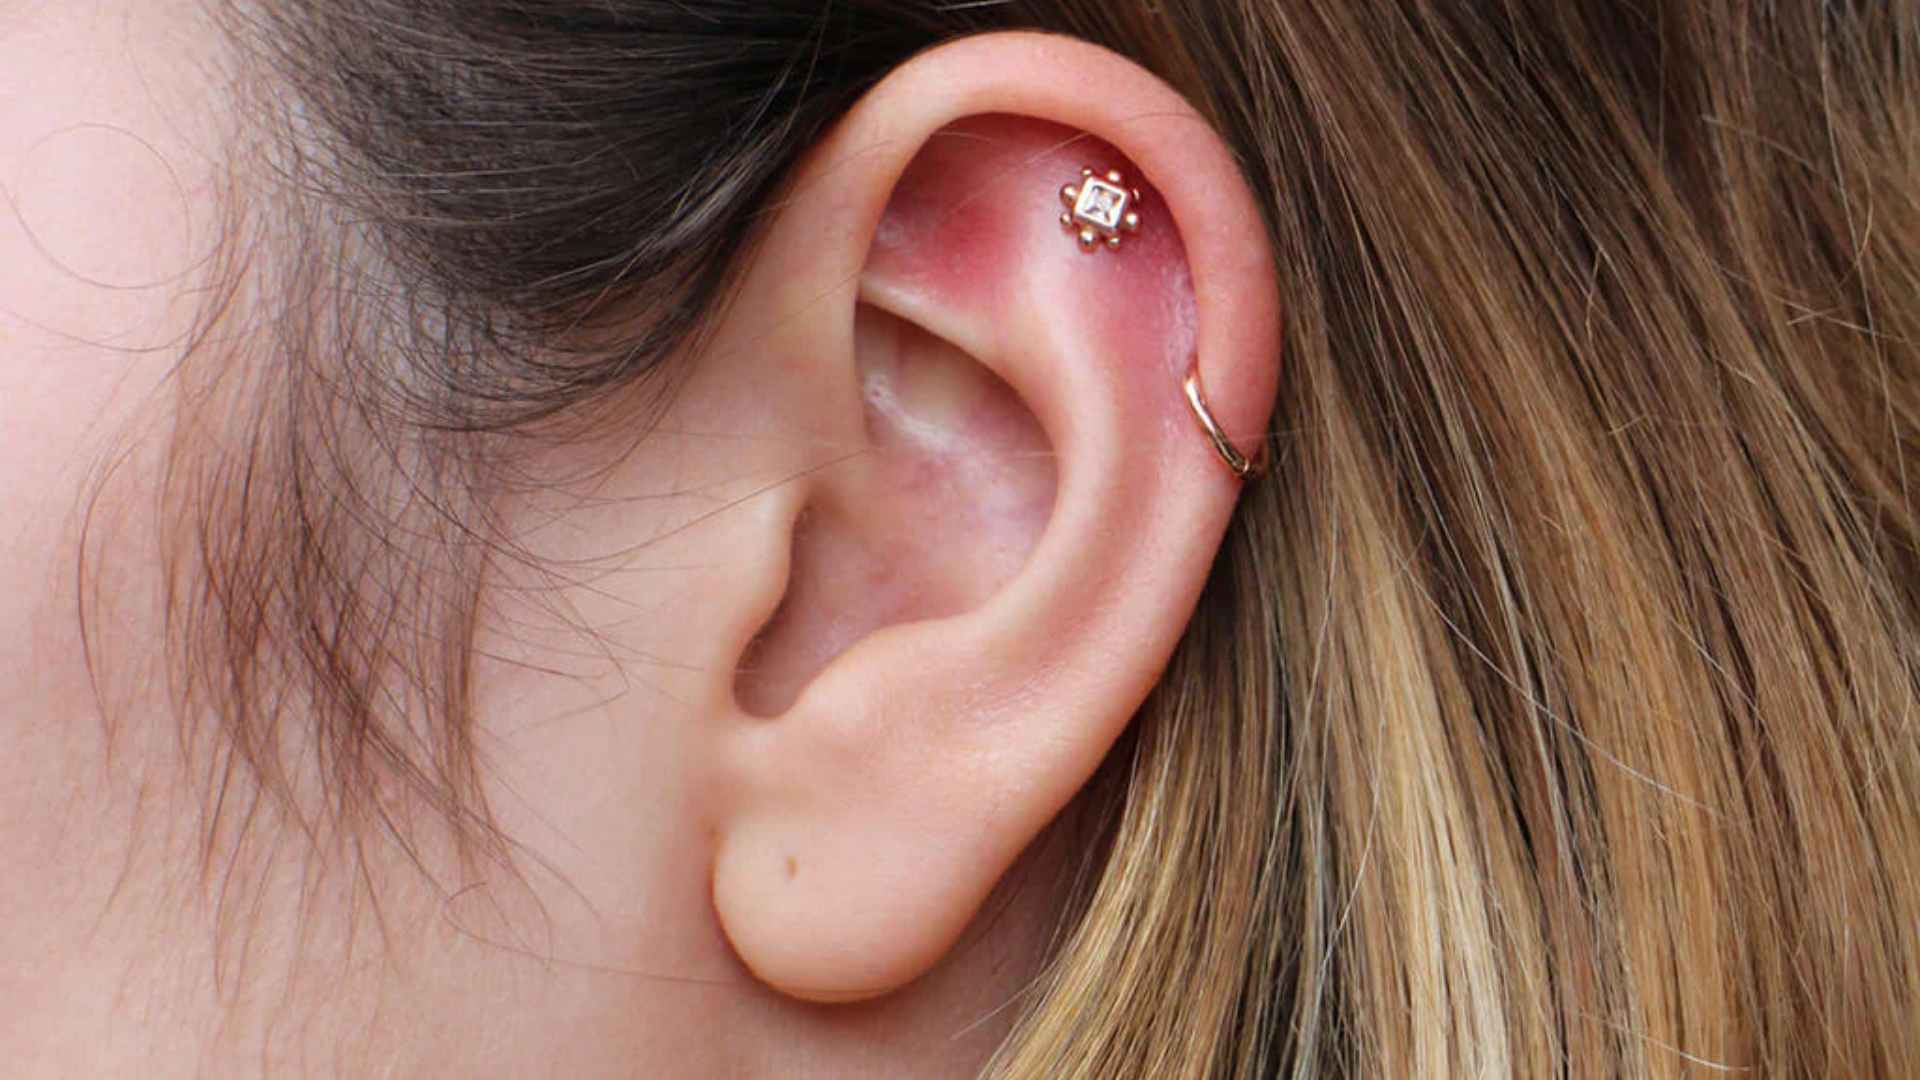
| Pain | Healing | Best starter jewelry |
|---|---|---|
| 4–5 | 6–9+ months | Low-profile flat-back stud (hoops after healing) |
This piercing goes through the upper rim of your ear: that curled outer edge. It’s one of the most popular cartilage piercings because it looks great and works with most ear shapes.
6. Forward Helix
| Pain | Healing | Best starter jewelry |
|---|---|---|
| 5 | 3–9 months | Flat-back stud; careful placement/alignment |
Instead of the back rim, this piercing sits on the front rim of your ear, above your tragus. You can get one, two, or even three in a row! It’s a bit more painful than a regular helix because the cartilage is thicker there.
7. Flat / Scapha
| Pain | Healing | Best starter jewelry |
|---|---|---|
| 5–7 | 6–12 months | Low-profile flat-back stud (reduces snagging) |
This goes in the flat area of cartilage between your helix and your inner ear. It’s perfect for showcasing fun jewelry since it’s a nice, visible spot. Expect moderate pain and healing time.
8. Auricle (Mid-Helix)
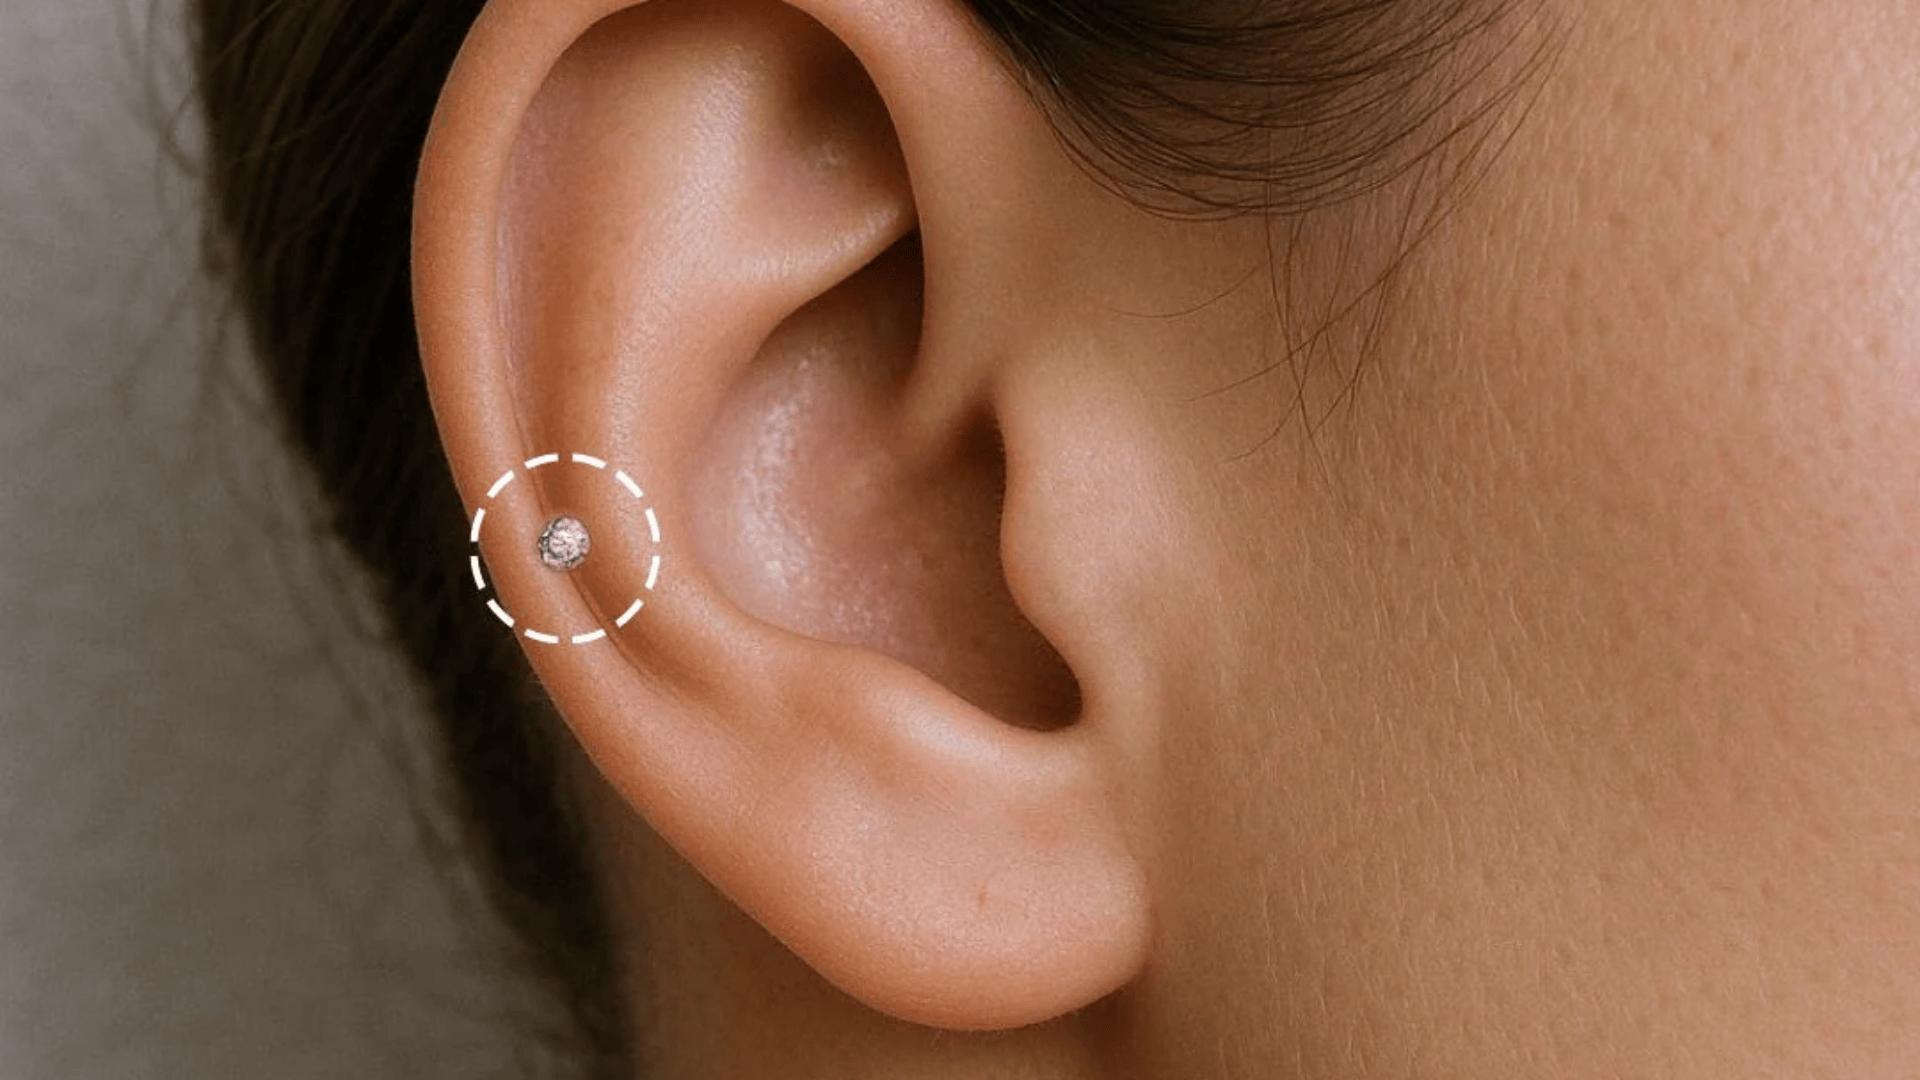
| Pain | Healing | Best starter jewelry |
|---|---|---|
| 3–5 | 3–9 months | Huggie-size hoop or flat-back stud |
Similar to the helix but lower down, in the middle section of your outer ear rim. It’s a less common spot, which makes it unique and perfect for those wanting something a little different.
9. Industrial / Scaffold
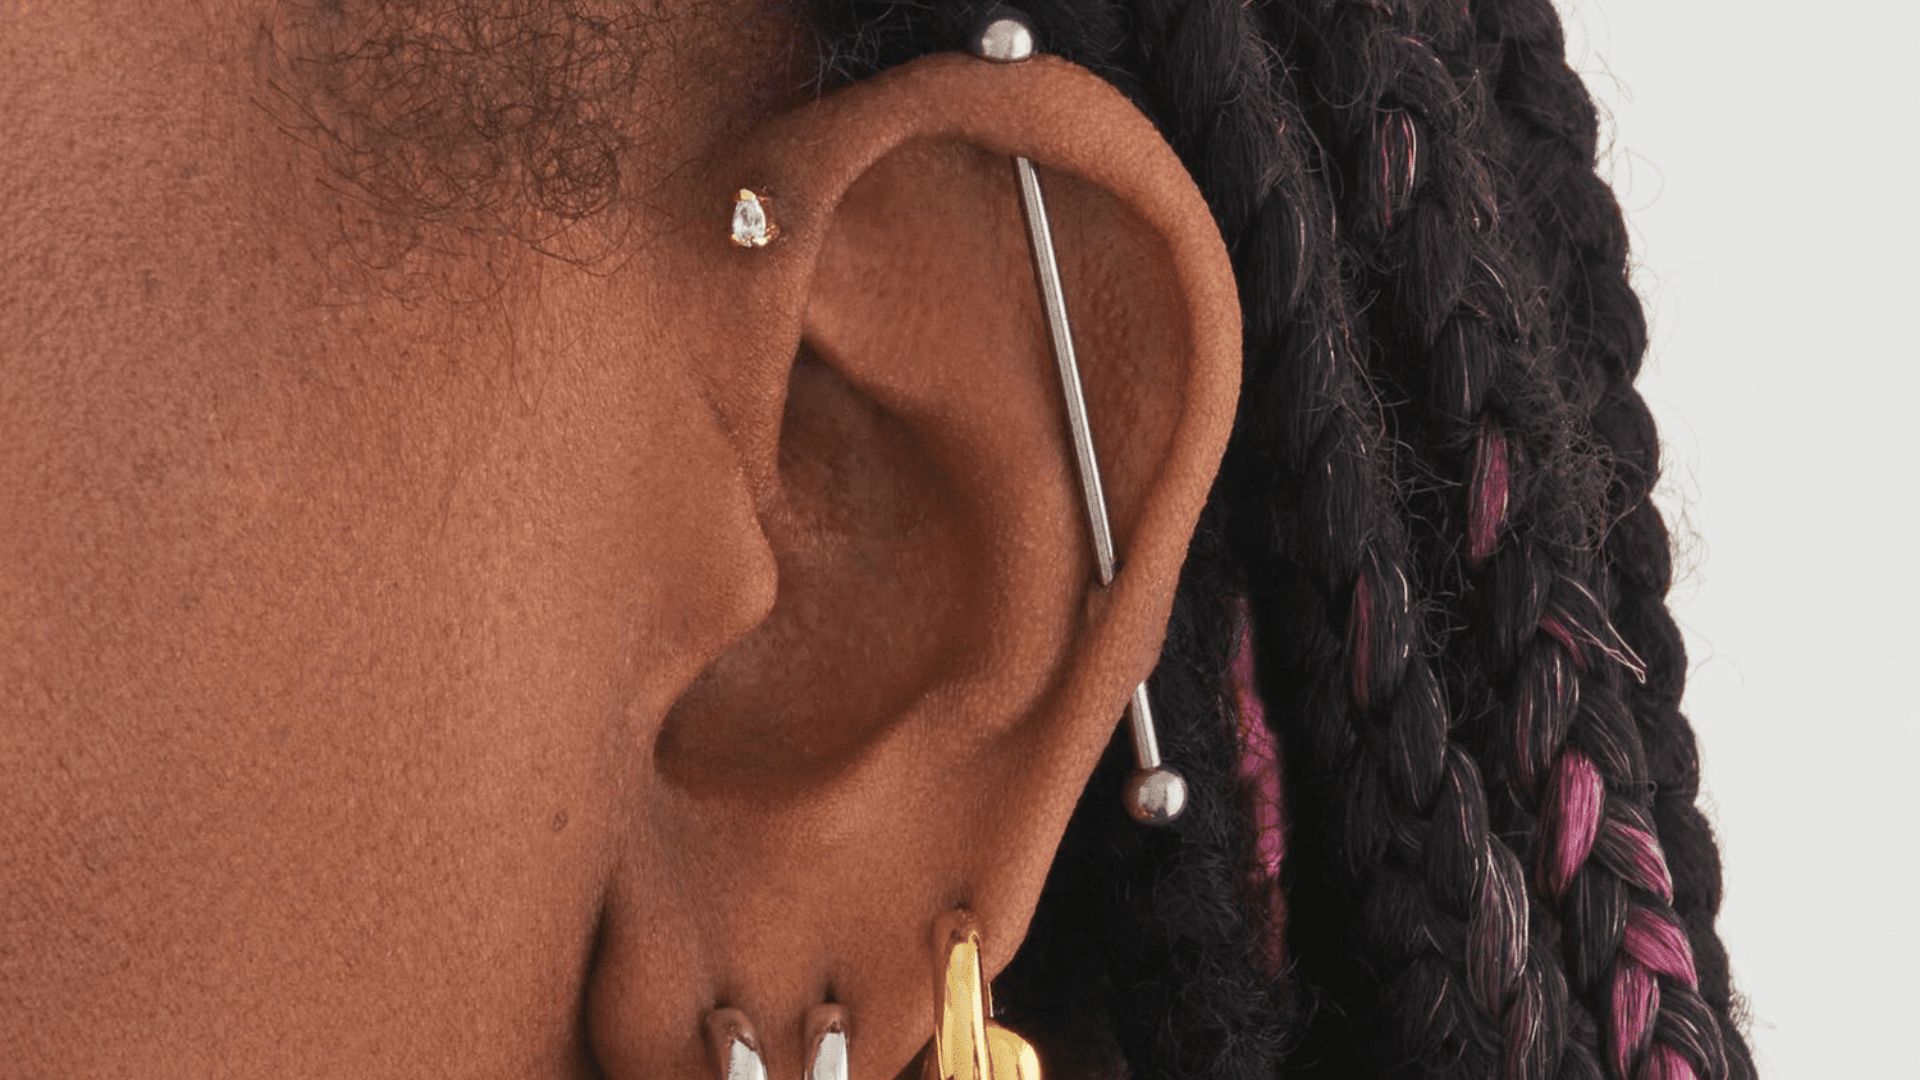
| Pain | Healing | Best starter jewelry |
|---|---|---|
| 6–8 | 6–12+ months | Industrial barbell; avoid pressure while healing |
An industrial uses one long barbell that goes through two holes, usually on the upper ear, connecting the forward helix area to the back helix. It’s definitely one of the more painful piercings (6 to 7 out of 10) and takes 6 to 12 months to heal. But the result is striking and edgy.
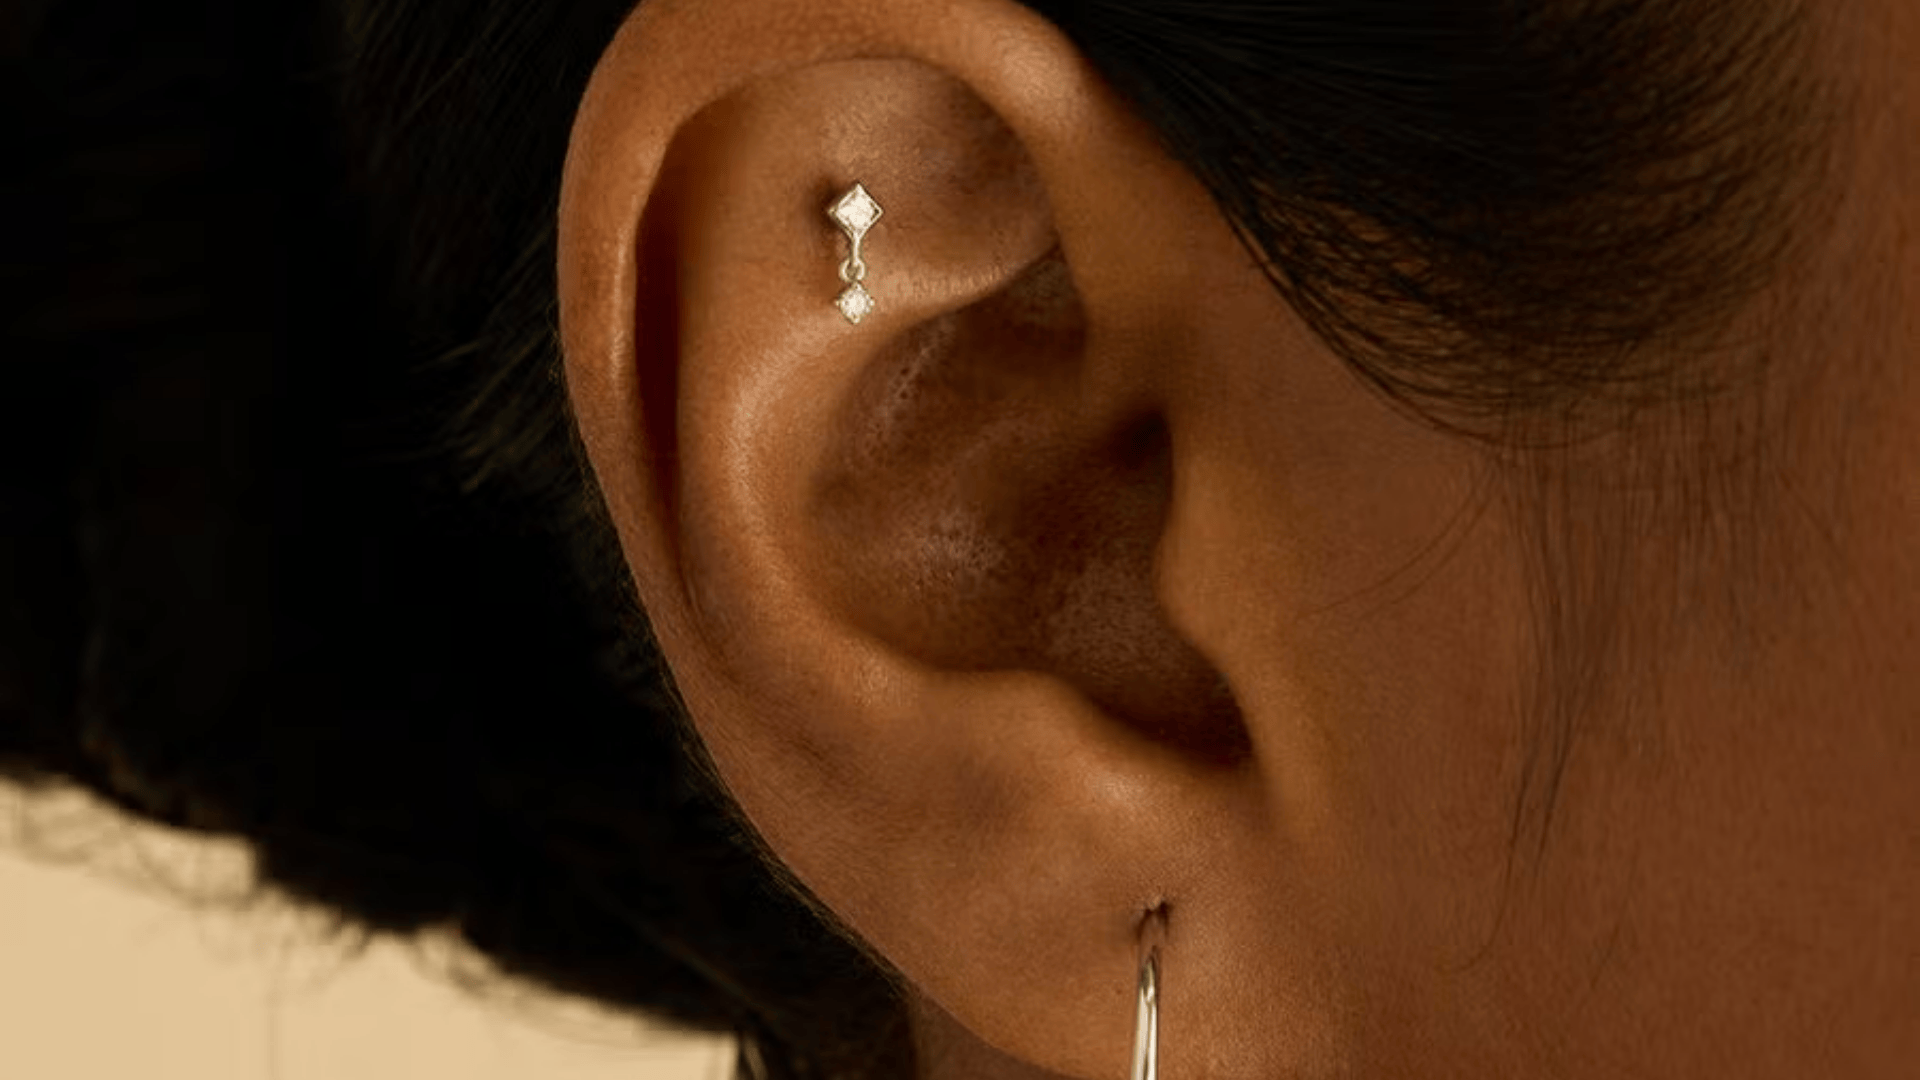
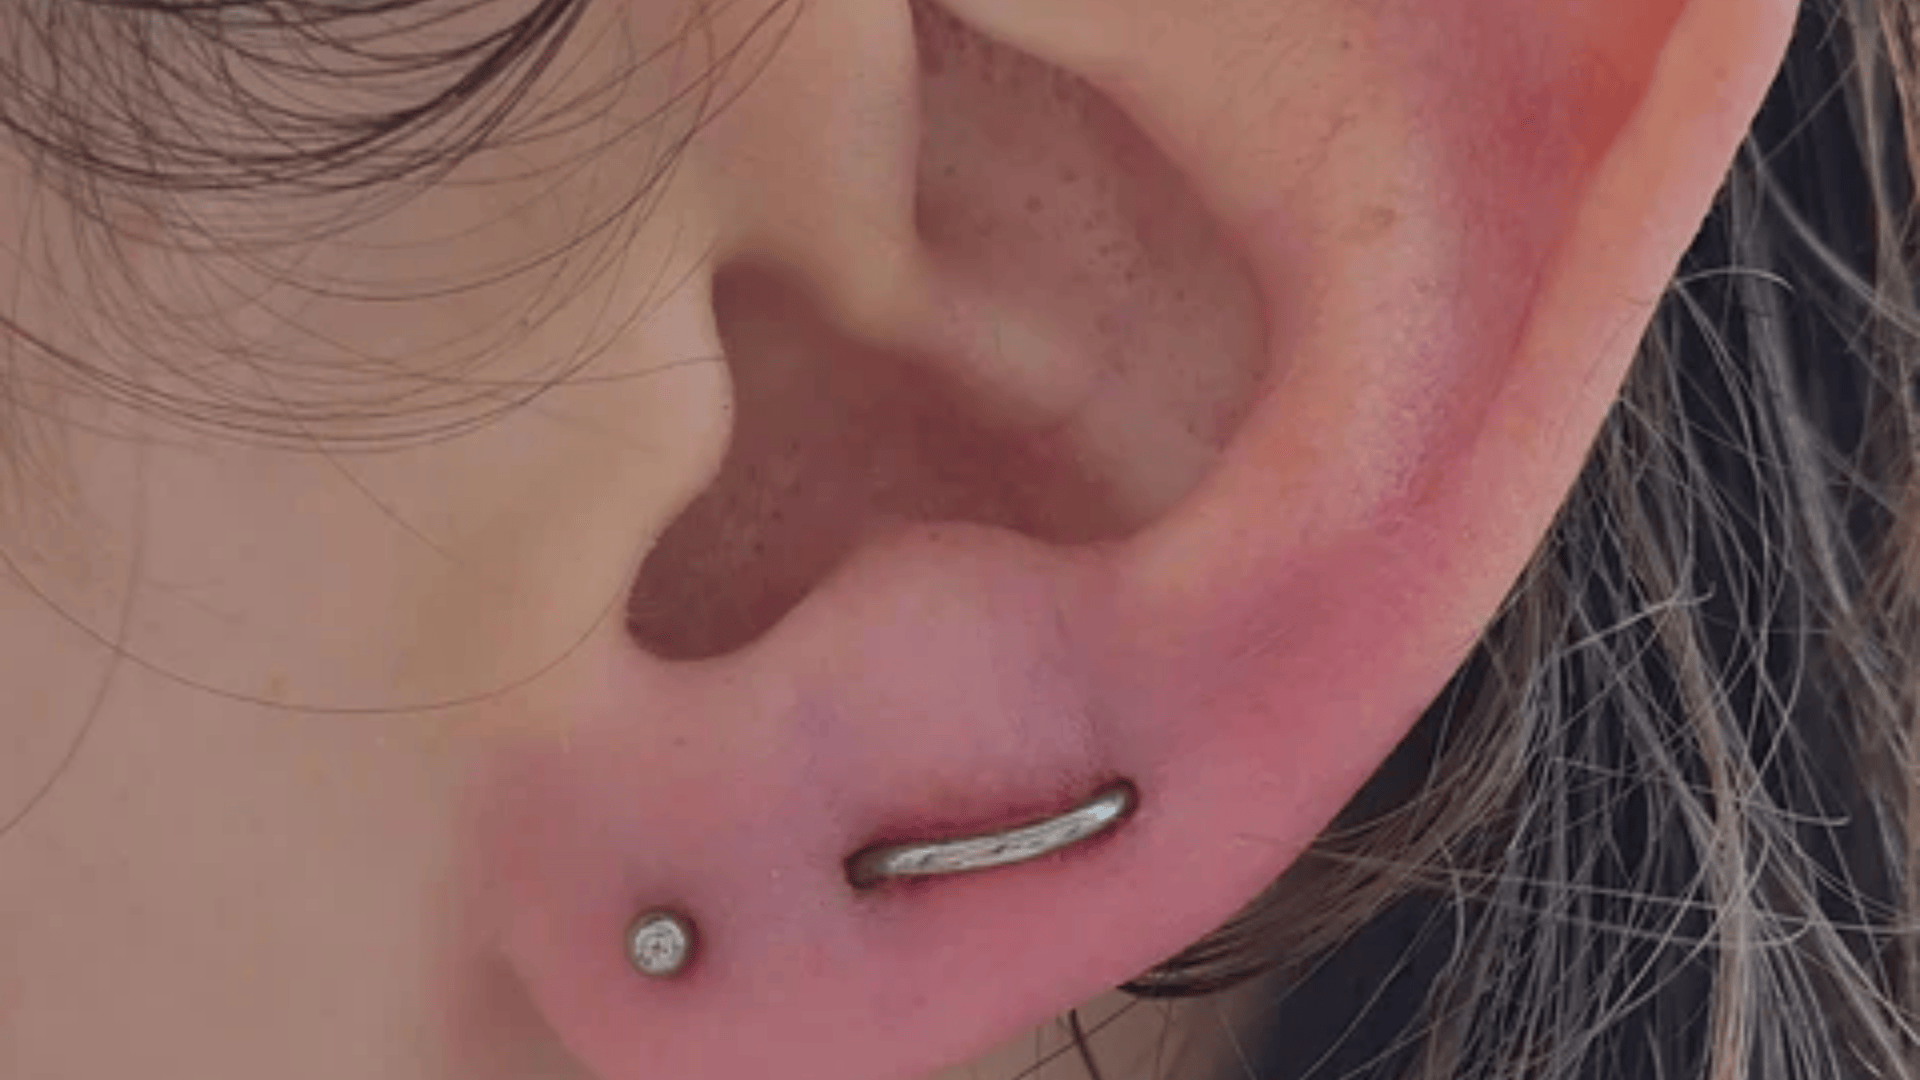
10. Tragus
| Pain | Healing | Best starter jewelry |
|---|---|---|
| 5 | 3–9 months | Flat-back stud (hoops move more) |
That cute little triangular flap that covers your ear canal? That’s the tragus. A tragus piercing is surprisingly popular because it’s visible from the front and side. Pain is moderate (5 to 6 out of 10), and you’ll need 3 to 9 months for healing.
11. Surface Tragus
| Pain | Healing | Best starter jewelry |
|---|---|---|
| 5–7 | 6–12 months | Surface barbell/PTFE; expert piercer only |
This is a surface piercing that sits on top of the tragus area rather than through it. It’s less common and a bit trickier to heal. Fair warning: surface piercings can be more prone to rejection than traditional through-and-through piercings.
12. Anti-Tragus
| Pain | Healing | Best starter jewelry |
|---|---|---|
| 6 | 9–12 months | Curved barbell or small snug ring |
Look opposite your tragus, on the other side of your ear canal opening. That small bump is the anti-tragus. Not everyone has enough cartilage here for this piercing, so check with your piercer.
13. Rook
| Pain | Healing | Best starter jewelry |
|---|---|---|
| 6–7 | 6–12 months | Curved barbell; angle matters |
See that ridge of cartilage in the upper inner part of your ear? That’s the rook. This piercing goes through that fold, creating a hidden but cool look. Because it’s tucked away, it’s well-protected during healing.
14. Snug (Anti-Helix)
| Pain | Healing | Best starter jewelry |
|---|---|---|
| 8–9 | 6–12+ months | Curved barbell/light ring |
This piercing goes through the inner rim of your ear: the ridge parallel to your outer helix. It’s called “snug” because the jewelry fits snugly in that groove. Be warned: this is often rated as one of the most painful ear piercings (7 to 8 out of 10).
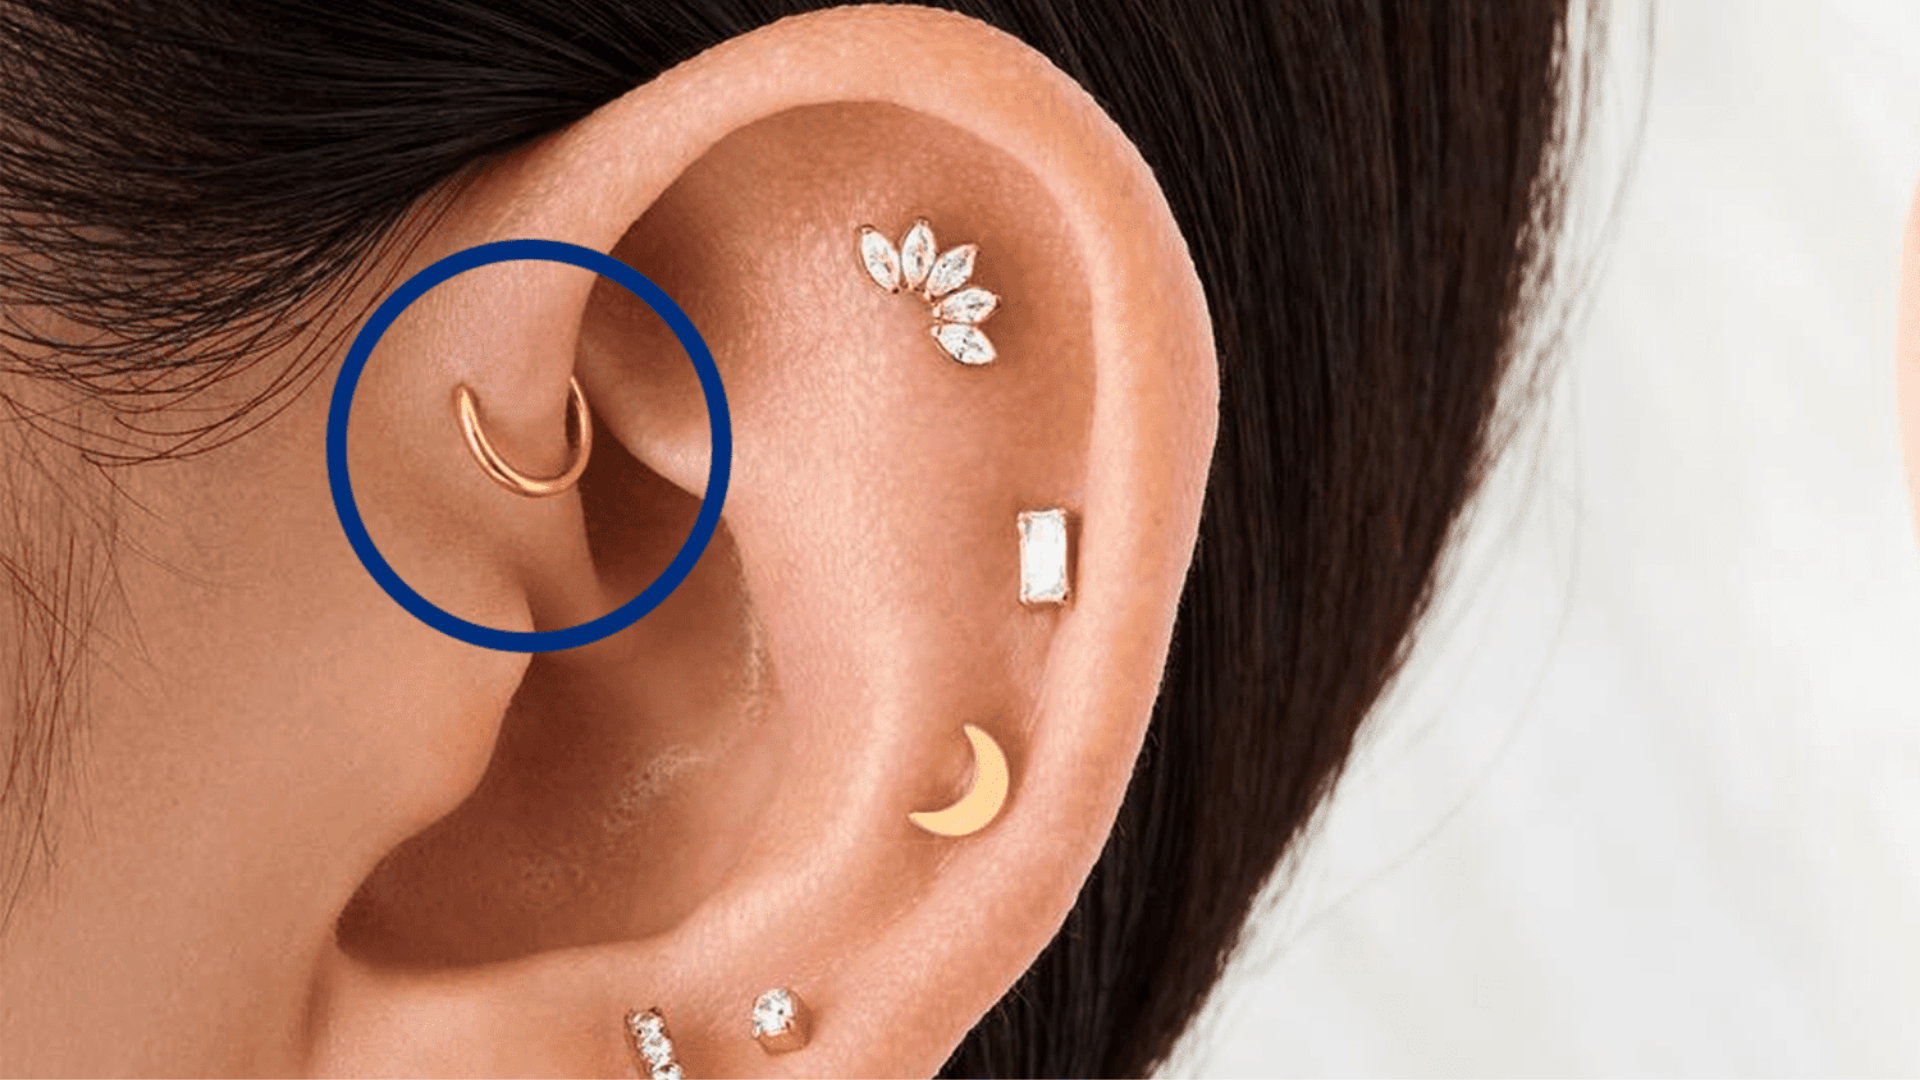
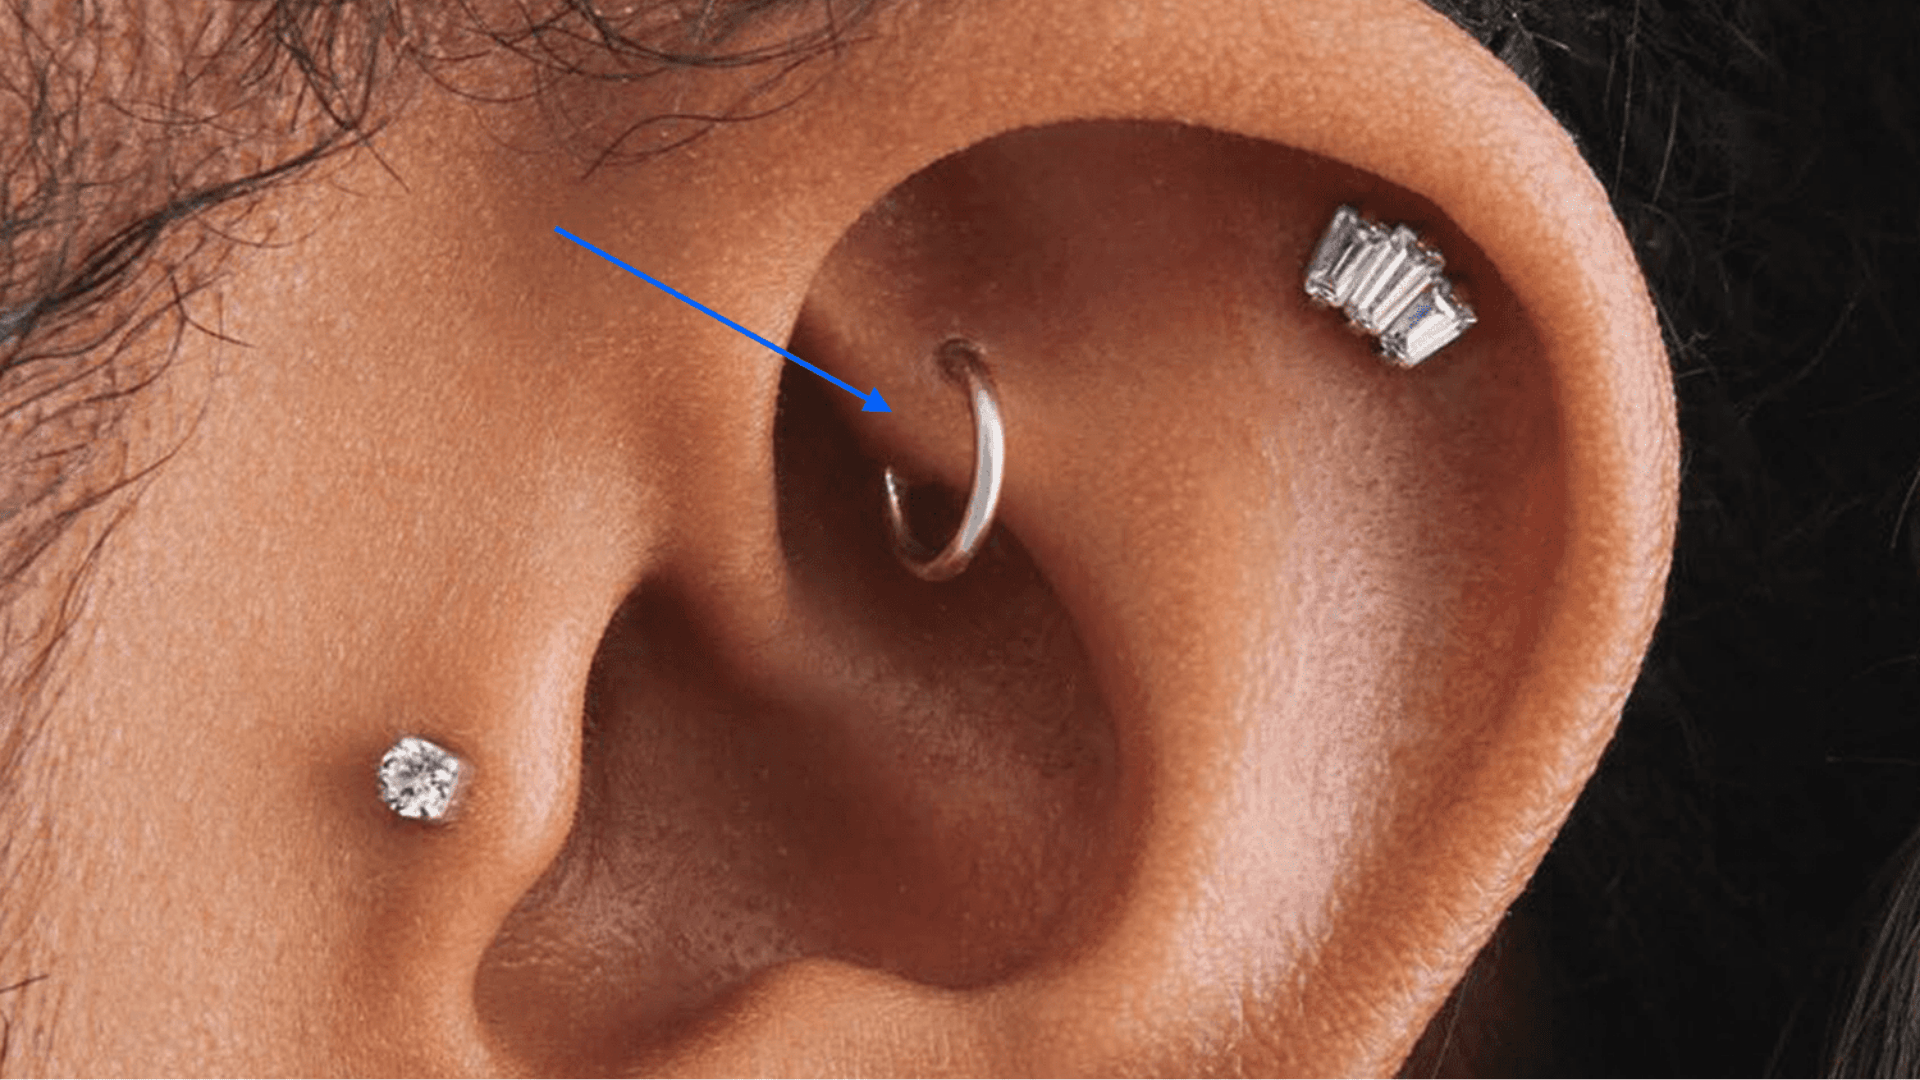
15. Daith
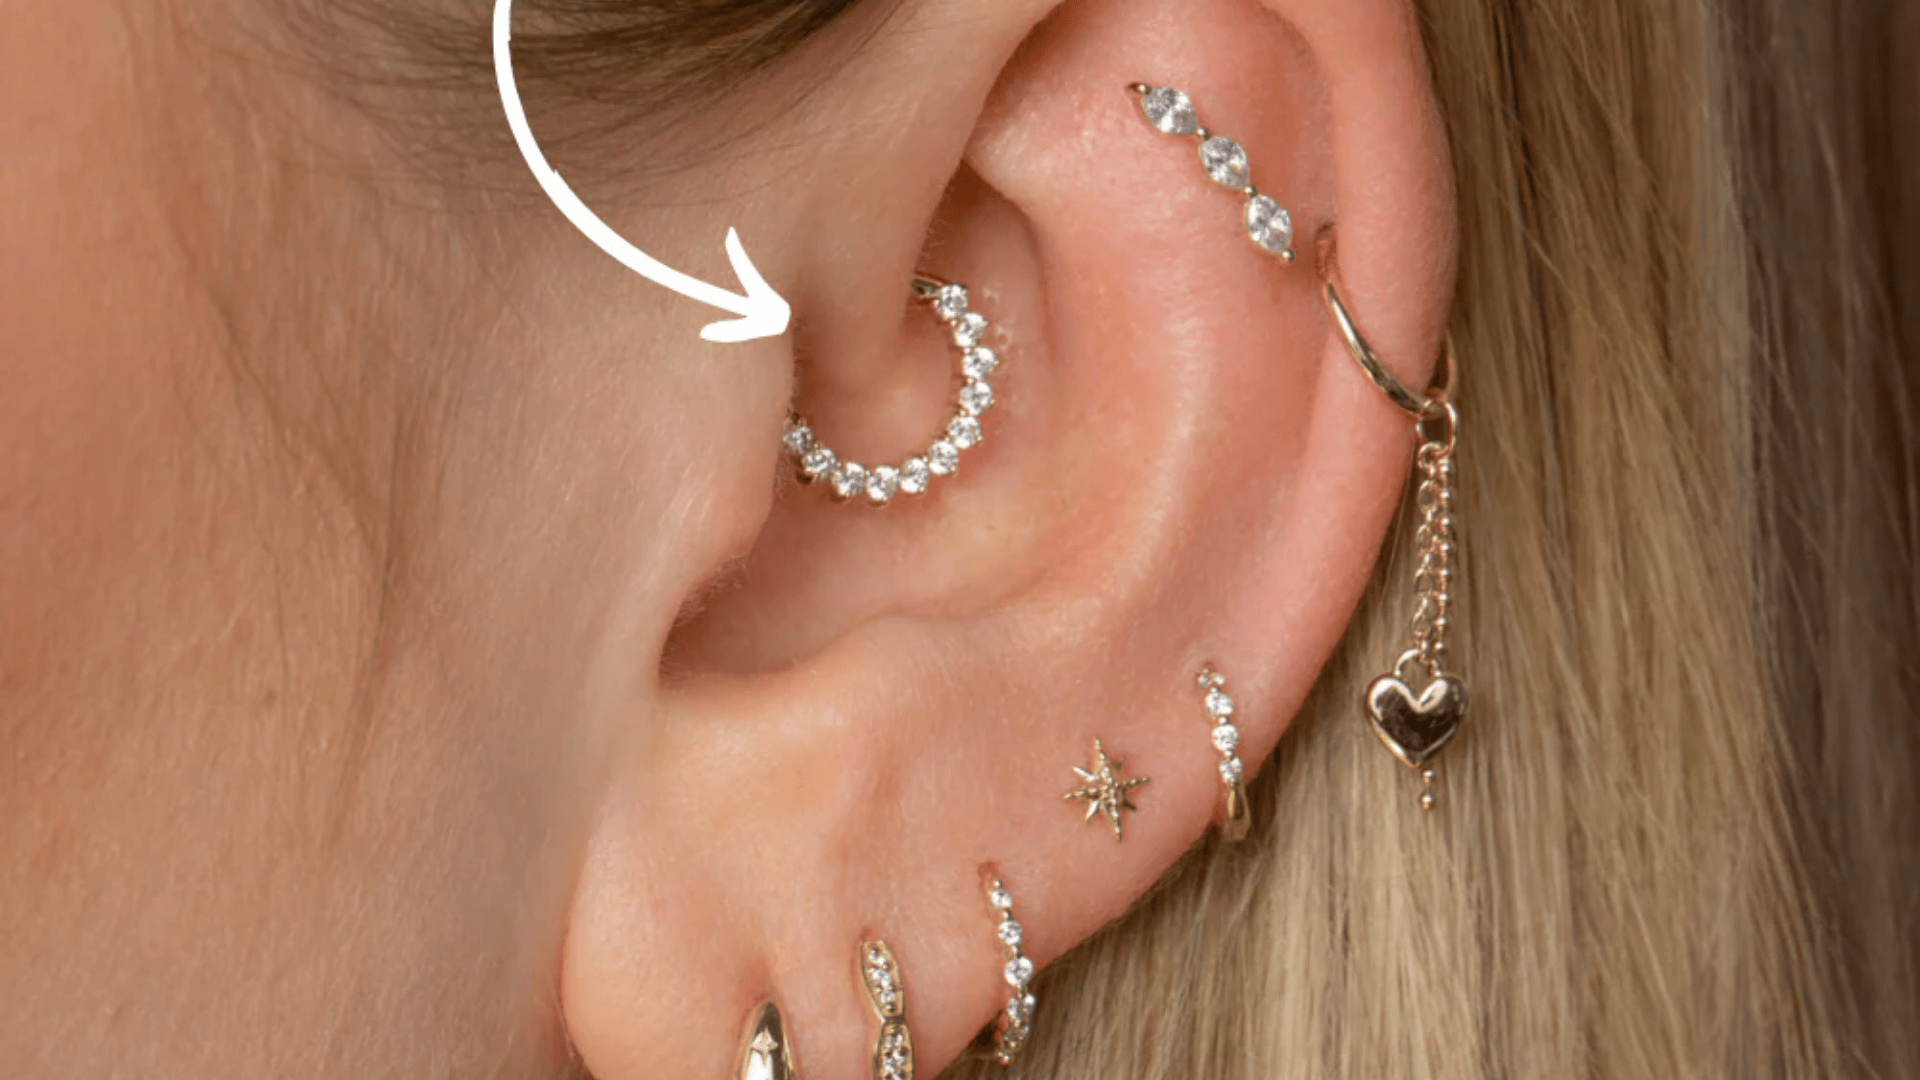
| Pain | Healing | Best starter jewelry |
|---|---|---|
| 5–6 | 6–9 months | Clicker/CBR ring; light, smooth edges |
Pronounced “doth” (rhymes with “moth”), this piercing goes through the innermost fold of cartilage just above your ear canal. It’s become trendy partly because some people claim it helps with migraines, though there’s no scientific evidence for that. Treat it as a style choice!
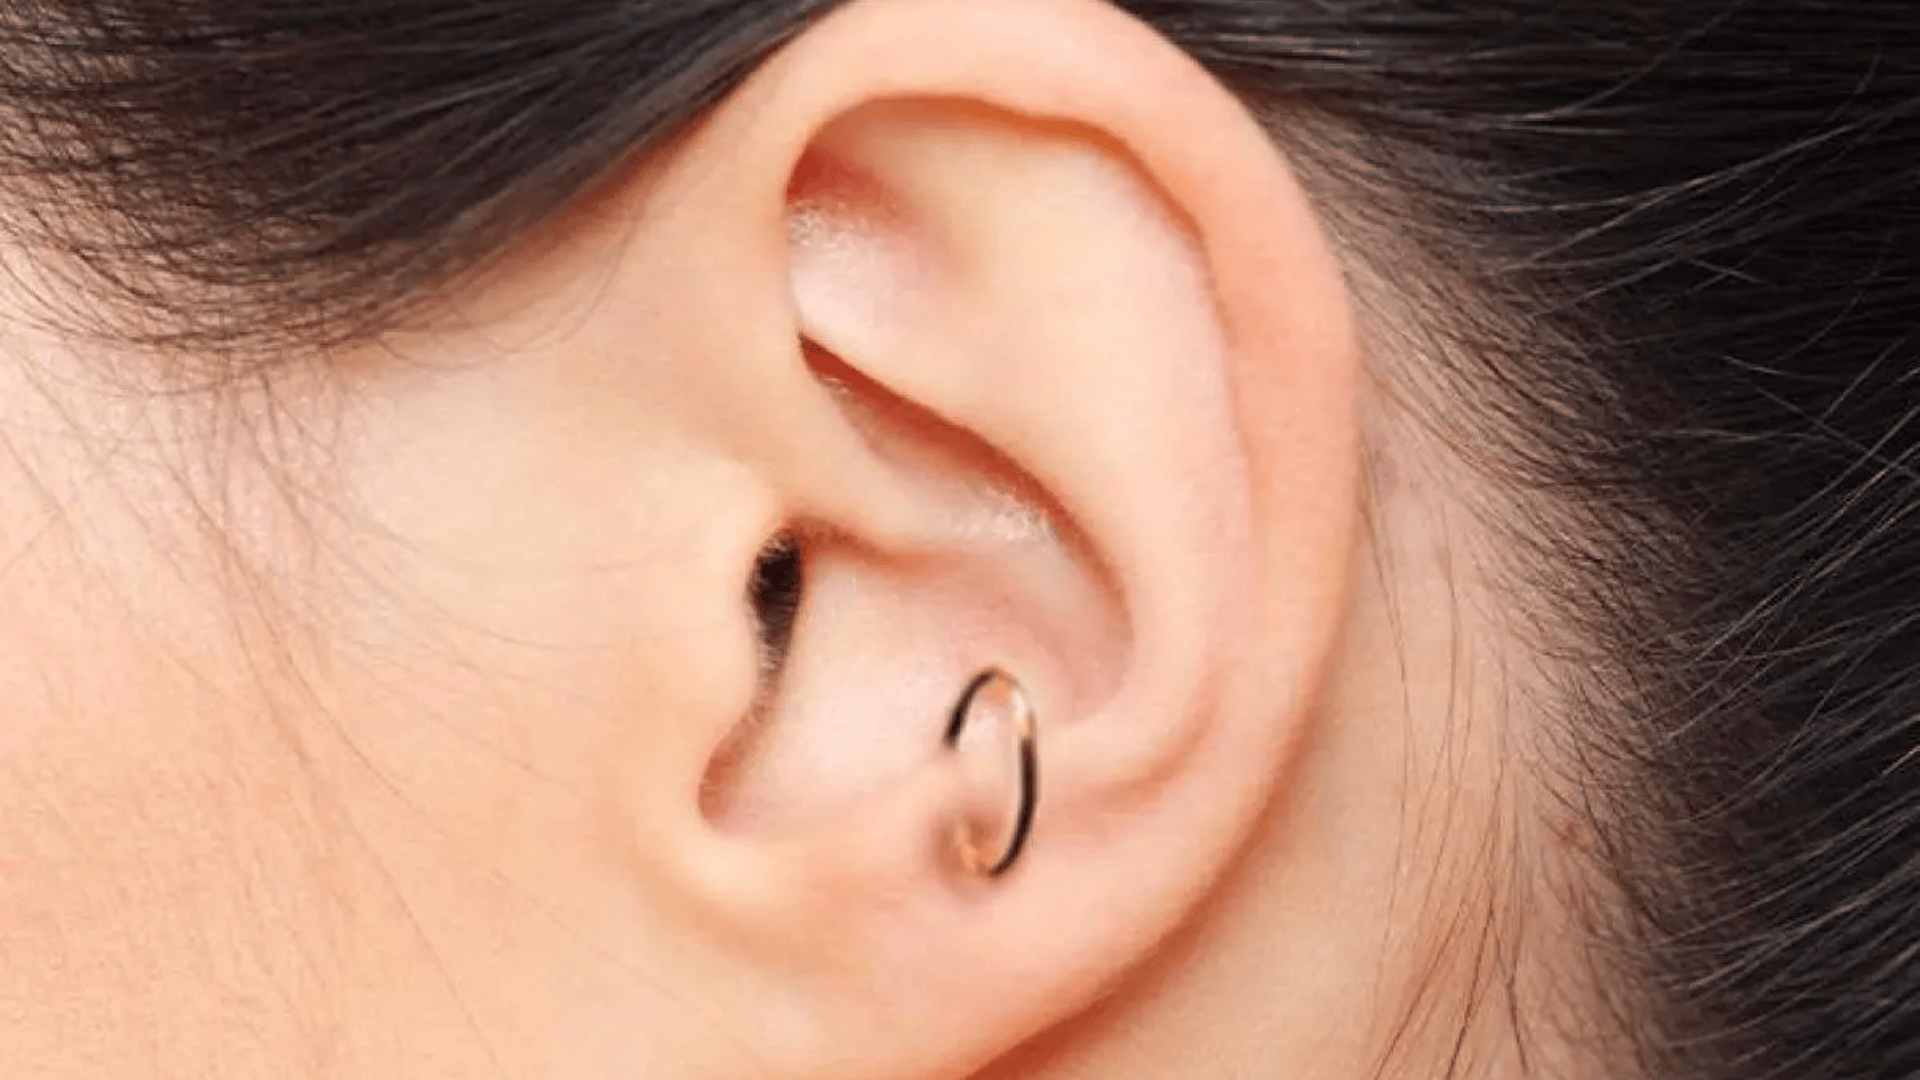
16. Conch (Inner)
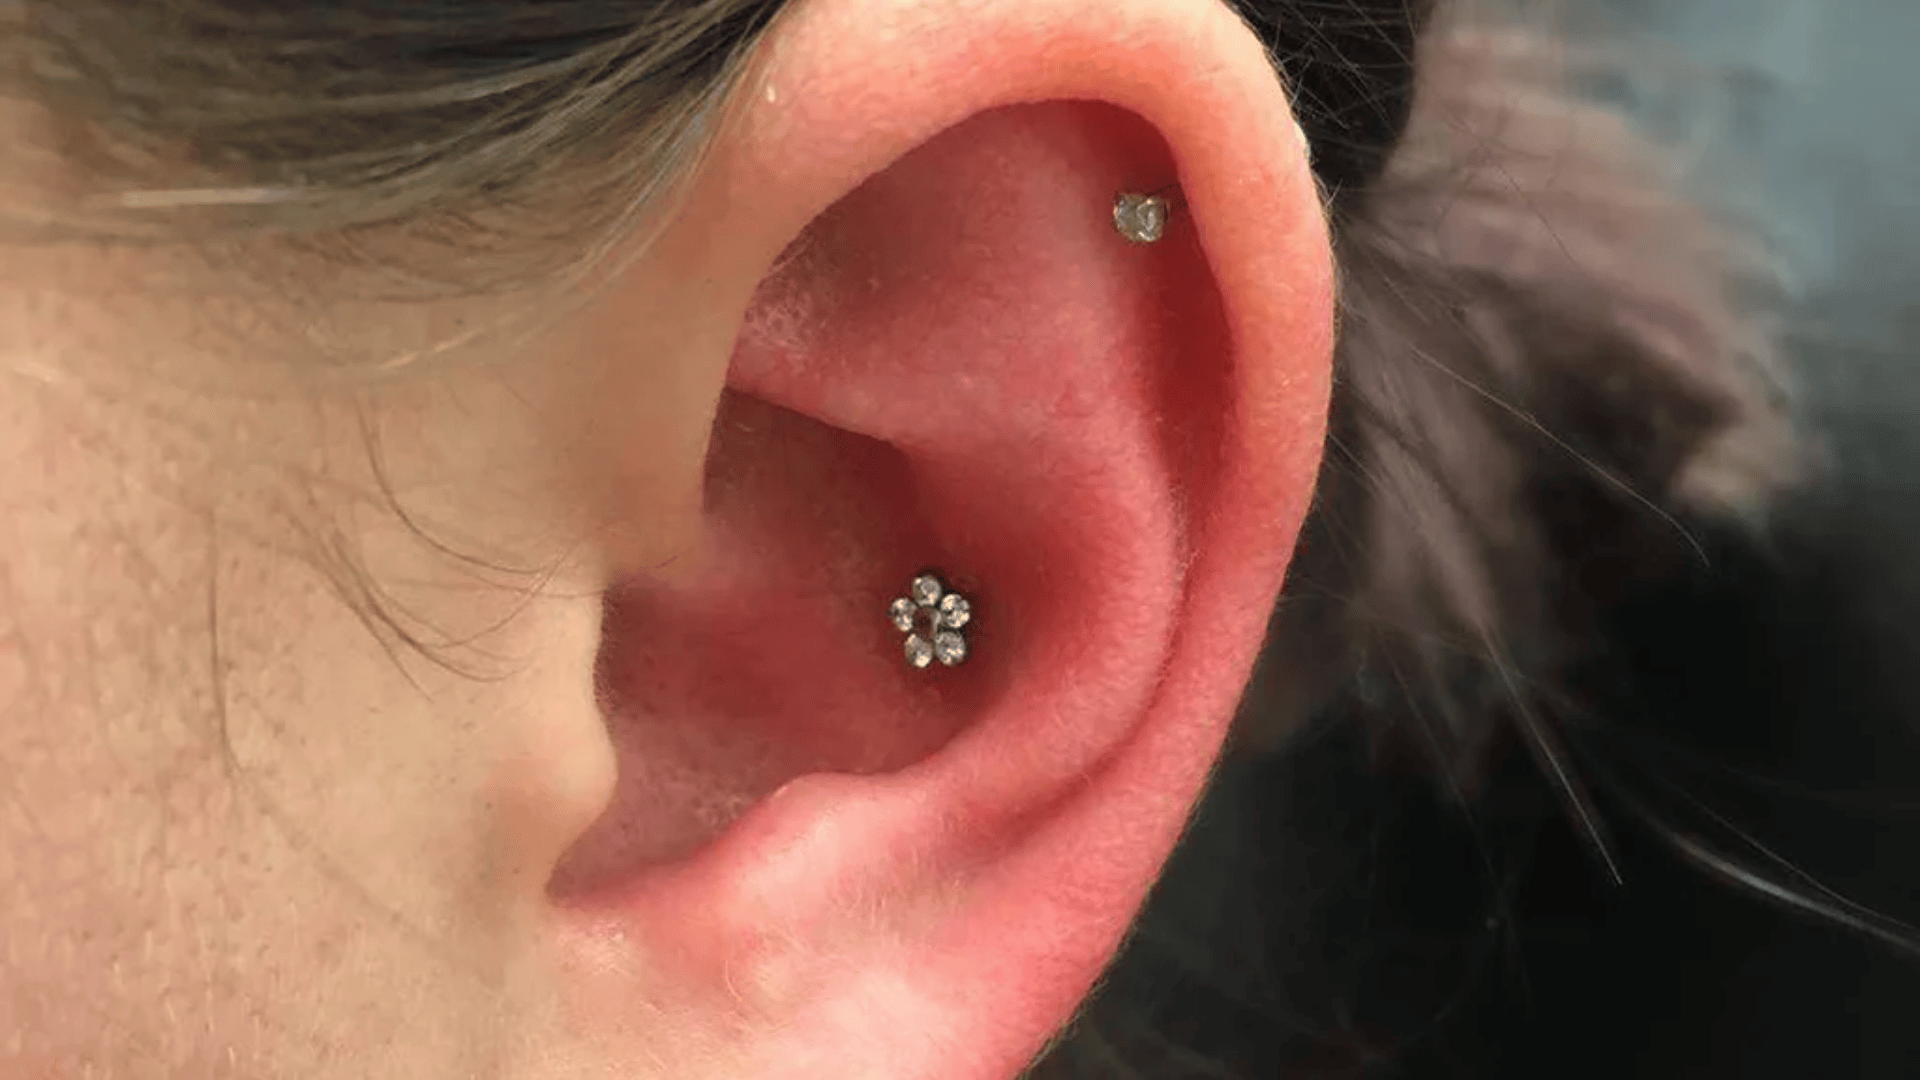
| Pain | Healing | Best starter jewelry |
|---|---|---|
| 5–7 | 3–9 months | Flat-back stud first; hoop after healing |
The conch is that big bowl-shaped area in the middle of your ear. An inner conch piercing sits deeper in that bowl. Because there’s so much cartilage, it’s a bit painful and takes longer to heal.
17. Conch (Outer)
| Pain | Healing | Best starter jewelry |
|---|---|---|
| 5–7 | 3–9 months | Seamless/CBR hoop-hugging rim (after healing) |
This variation sits toward the outer edge of that bowl area, closer to where it meets your face. Healing and pain are similar to the inner conch. Both conch placements look gorgeous, especially with a statement stud or hoop.
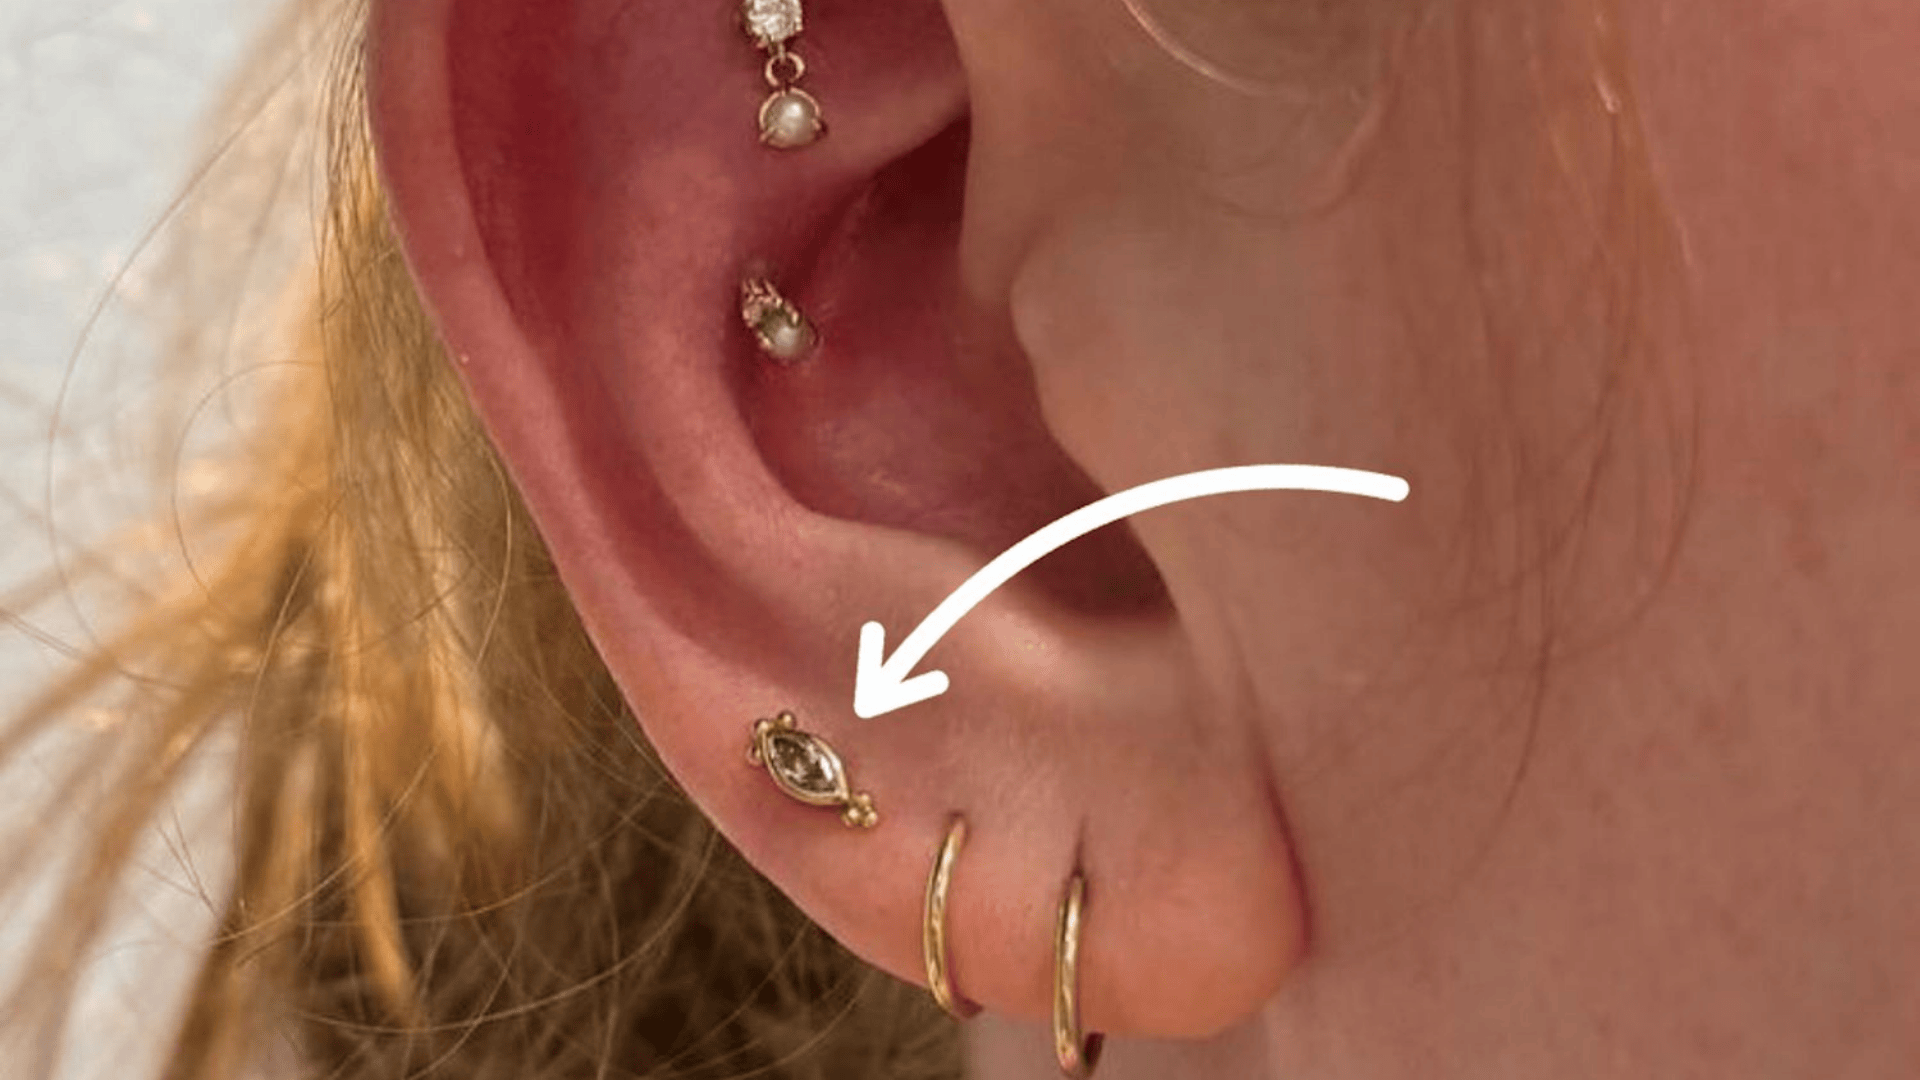
18. Orbital (Lobe)
| Pain | Healing | Best starter jewelry |
|---|---|---|
| 3–5 | 6–10 weeks | Smooth/CBR ring sized to your anatomy |
An orbital uses one piece of jewelry (usually a hoop) that goes through two holes close together. In this case, both in your lobe. The hoop “orbits” that section of your ear, creating a unique layered look.
19. Orbital (Helix/Cartilage)
| Pain | Healing | Best starter jewelry |
|---|---|---|
| 4–6 | 6–12 months | Smooth/CBR ring; extra care to limit movement |
Same concept, but with two cartilage holes connected by a single hoop. This creates a cool layered effect on your upper ear. Because it involves cartilage, expect the longer healing time.
Safety First: What to Ask Your Piercer
Getting pierced should be safe, clean, and professional. Here’s what to look for:
- Choose a reputable studio. Look for piercers who are members of or follow the standards of the Association of Professional Piercers (APP). These professionals have training and follow strict safety rules.
- Needle, not gun! This is huge. Professional piercers use sterile, single-use needles, never piercing guns. Guns can damage your tissue, can’t be properly sterilized, and can cause more pain and complications. If someone offers to use a gun, walk away.
- Start with quality jewelry. Your first piece of jewelry matters a lot. Ask for implant-grade titanium or solid 14k or 18k gold. These materials won’t irritate your new piercing. Avoid mystery metals, nickel, and fashion jewelry until you’re fully healed.
- Aftercare instructions matter. Your piercer should give you clear aftercare instructions. The gold standard is sterile saline solution (salt water), not rubbing alcohol, peroxide, or random creams. A good piercer will make sure you understand how to care for your new piercing.
Don’t be shy about asking questions! A professional piercer will happily answer all your concerns before they start.
Aftercare Basics That Actually Help
Now comes the important part: aftercare. This is what makes the difference between a beautiful, healthy piercing and a painful, infected mess.
| Aftercare Rule | What to Do |
|---|---|
| Hands off! | Don’t touch, twist, or play with your piercing. Only touch when cleaning with freshly washed hands. |
| Sleep smart | Avoid sleeping on your fresh piercing. Use a travel pillow with a hole to keep pressure off your ear. |
| Saline only | Clean 2 to 3 times daily with sterile saline. Avoid alcohol, peroxide, Neosporin, or tea tree oil. |
| Downsize jewelry | Return to your piercer after a few weeks to switch to shorter jewelry as swelling goes down. |
| Be patient | Lobes heal in 6 to 8 weeks; cartilage takes 3 to 12 months. Keep up with aftercare the entire time. |
| Watch for warning signs | Some redness is normal, but see a professional if you notice excessive swelling, discharge, severe pain, or fever. |
Conclusion
Now you know all about the different types of ear piercings, from simple lobe options to cartilage designs!
You’ve learned the proper ear piercing names, what to expect for pain and healing, and how to stay safe.
Remember: choose a professional piercer who uses needles and quality jewelry, be patient with cartilage piercings, and follow proper aftercare every single day.
Your ear is your canvas, and piercings are a fun way to express yourself. Ready to get your piercing?
Drop a comment below and tell us which piercing you’re planning to get next, or share your favorite piercing experience. I’d love to hear your story!